For professional organizer Elizabeth Tawney Gross, sewing is like a beach vacation, except there’s no sand and no sunburn (unless you back into the iron!)
Well, we’re kinda stretching it here. Actually she’s talking about your sewing room. If you approach organizing your sew-space with a beach vacay metaphor in mind, it’s easy to have just what you need where you need it when you need it, says Elizabeth. As the brains and guts of Organizing For Everyday in Albuquerque, New Mexico, she helps people clear clutter and define their own sense of organization. And she loves working with stitchy types!
Elizabeth’s theories about organizing sewing areas are time-tested, because throughout more than 30 years of marriage to a military guy (and so many moves it would make your head spin) she’s had to get herself organized to sew in the tiniest—and most transient–of spots.
“The story of my life is punctuated by….’and then we moved,’” says Elizabeth, who only this year set up a dedicated sewing room in her home. Before that, she created her temporary sew-space wherever she could, including sometimes on the top of an ironing board. If you keep yourself organized, though, it can work.
“You can organize with the beach vacation system wherever you sew,” she says, during a presentation to a group of quilters and sewists at Hip Stitch, an Albuquerque-based modern fabric shop.
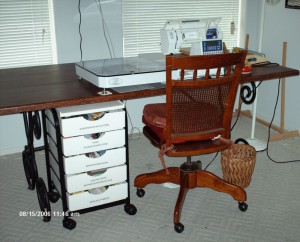
The beach vacation idea starts with the water itself, which is your sewing machine, Elizabeth says. And any space right around the machine is prime real estate—beachfront property, if you will. This is for items you use constantly, like thread nippers or pin cushions. Small trays or bins are perfect for containing little items and easily tucking them away when sewing is finished.
Further out from the “water”—one block from the beach—is still reasonably prime space. It’s where you store things you don’t use as often, but still need close, such as a tiny screw driver, lint brush, rotary cutter and mat, marking pens.
Ocean-view stuff is used even less frequently, and this is where your stash lives, as well as patterns, books, batting, special threads, etc., she says.
What about those of us who have to put up and take down our “beachfront” every time we sew? How can we stake out storage to fit this metaphor? Simple, says Elizabeth. Just take your toys to the beach in “beach bags.” Use small storage carts on wheels, fabric sewing caddies that fit under your machine, stackable baskets or even fishing tackle boxes to move your toys, er, tools to the machine when you’re sewing. And then you can easily tuck your toys away when you’re finished.
“Be creative when you’re thinking about your ‘beach bags,’” says Elizabeth. And you can often just re-purpose something you already have, rather than spending your FQ cash on a container. Some faves include drawer dividers, zipper pouches, 3-ring binders with page protectors and jars and cans.
A poorly organized sew-space is often a case of more is, well, too much. Stitchers frustrate themselves by trying to have everything right by the sewing machine, she says.
“You end up not being able to find anything! It’s like keeping all your pots and pans on the stove…all the time!” Elizabeth says.
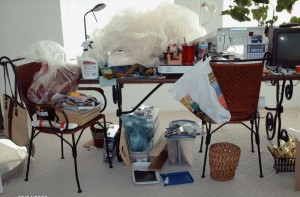
If you’re reclaiming a really messy sewing space, she suggests a strategy that works for any disorganized space: Just start.
Start with a small area, she says, and use some sorting boxes or bins to sort it out according to whether items are 1) trash, 2) stuff to shred or recycle, 3) stuff to keep, 4) stuff to donate and 5) stuff that goes someplace else. Just open up a path to that machine, and you will begin to feel the power and peace that comes from getting organized.
Elizabeth says stitchers often have problems with keeping their work spaces organized, but it’s not because of some rogue genome on our stitchy DNA.
“My favorite people are crafters, artists and sewists because I love their creativity,” she says. “And a lot of creative people are disorganized because they have too many ideas.” And sometimes they resist getting organized because they’re afraid they’ll lose those ideas.
“What they don’t understand is they are actually much more creative if they can find things.”
Here are some of Elizabeth’s specific tips for sewists:
- Sort like with like. For example, put UFOs, WIPs and mending into separate baskets or bins, according to type.
- Keep a written list of projects, with notes of what needs to be done and any supplies that might be needed. That way when you find a little time to sew, you can pick the project that fits the time available.
- Keep deadline-oriented projects on top of the stack in the appropriate basket.
- Accept the fact that about every few months, your sewing room or studio will probably need another org overhaul. And over time, your fiber-priorities will become better defined, which will help decrease the volume of the mess.
- Organize your stash according to how you pull fabric for projects. If your first thought is of color, then do it by color. Or if you think print or solid first, then sort by those categories. Or use a combination of both strategies. Whatever works for you is what works.
Every sew-space has different needs and different possibilities. You just have to shape it to fit your style, and keep it organized enough to be effective. And remember, says Elizabeth, that “good enough is good enough!”
Eco Extra: Elizabeth suggests making your own drawer dividers from the bottoms of cereal boxes. Here’s her simple technique:
1) Strip off any loose paper covering the outside of the box, and remove and throw away the inner bag. Shake out any crumbs.
2) Decide if you want a narrow divider, or want to use the box flat, for a larger container.
3) Measure the height of your drawer to determine the depth of the divider, and subtract enough to make sure the divider will clear the top of the drawer when the drawer is pushed closed.
4) Using a ruler, measure up that pre-determined distance from the bottom (or side) of the box and mark a line. Cut along this line.
5) Cover the inside and outside of the cereal-box divider with heavy paper or fabric and glue in place. Fashion-print duct tape works, too!


COMMENT #1
Thank you Melissa, you captured exactly the principles I wanted people to learn during the presentation. Of course, if someone would like expert help getting their sewing area organized I would love to help. I will have to run my fingers through your stash though.
COMMENT #2
Thank you Melissa, you captured exactly the principles I wanted people to learn during the presentation. Of course, if someone would like expert help getting their sewing area organized I would love to help. I will have to run my fingers through your stash though.
COMMENT #3
Great practical advice!
COMMENT #4
I really like the idea of beach vacation organization! Now to just start.