By Jake Finch
Plain manila card stock is just too too boring to hold your great thoughts, amazing projects and important scribbles. Make a few of these fabulous fabricky folders in your fave print, and you’ll not only be organized in cutting-edge style, but you’ll have people slipping you lunch money to make them a set.
And can you imagine a more perfect way to rev up some school spirit than folders in school colors? Make your kids a bunch and they’ll rock study hall! (Hey,…PTO fundraiser, anyone?)
File Folder
Finished size open: 12” by 20”
Finished size closed: 12” by 10”
Materials:
- ½ yard of fabric for outside and pockets
- ½ yard of fabric for inside
- ½ yard of Fast2Fuse heavyweight fusible interfacing by C&T Publishing
- ½ yard of lightweight fusible interfacing (the weight like what’s used for sewing shirts
- Silicone Release Paper by C&T Publishing
- 250 yards of rayon thread (Sulky or Robison-Anton are two brands we use)
- 90/14 topstitch sewing machine needle (Schmetz and Superior Threads make some)
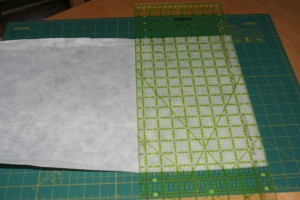
1. Cut one piece of fusible heavy interfacing at 12” by 20”.
2. Roughly cut two pieces of fabric, one for inside and one for the outside, a little larger than the interfacing. Fuse one piece to each side of the interfacing, one at a time and right sides of the fabric facing out. After each fabric is fused to the interfacing, carefully trim fabric to the edge of interfacing with scissors.
3. Cut one more piece of fabric for the pockets a little larger than the interfacing. Fuse lightweight interfacing to the wrong side of fabric. Fold in half lengthwise, wrong sides together, and press a sharp seam at along fold line.
4. On folder’s inside, place pocket so that fold line reaches 6” below the top edge of folder. Use ruler to make sure pocket’s placement is straight. Pin pocket in place at corners and bottom. At machine, with folder outside facing up, stitch just inside folder’s edge where pocket is. Then, trim pocket to meet edge of folder.
5. Round each corner of folder by tracing around a spool of thread or some other small round object. Cut rounded corners along traced line.
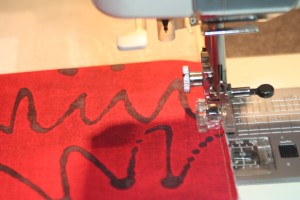
6. To edge stitch folder, set sewing machine to make a wide satin stitch. Use a machine foot that allows you to see that stitching as it progresses. Load rayon thread through top and wind onto bobbin also. Align folder under machine foot and hand crank the first stitch to make sure the right zigzag stitch drops off right edge of pieces as machine sews. Left zigzag stitch goes into the pieces. This creates a stitch that appears to wrap the edge of the interfacing, and it also joins the two pieces together. Move slowly around the rounded corners making sure the needle drops off right edge. When entire perimeter is edge stitched, trim threads and then repeat edge stitching one more time around. This finishes the stitching and covers up any mistakes or thread gaps from the first pass.
7. To enable folder to fold crisply, sew score lines through the middle. Use a rotary ruler to line up top edge of folder to the center and then draw line through the folder’s center on inside. Draw two more lines ¼” away from each side of center line. Straight stitch along each of the three lines, through pocket. Fold folder in half and press with iron along crease.
Trust Us:
- When using a heavyweight interfacing, read manufacturer’s directions carefully. Many interfacings work better with a hot steam iron.
- Heavyweight fusible interfacing is two-sided. Use an applique presser sheet or the Silicone Release Paper on your ironing surface when placing an exposed side of interfacing on the surface. If the adhesive does melt on the bare side, the interfacing won’t stick to the surface and, instead, the presser sheet will peel off of the bare side, protecting the ironing surface.
- When doing the edge stitching on the interfacing, rounded corners are definitely preferable! There is no stop and start of thread at the corners to unravel.
- You might need to lower your top thread tension when sewing through heavyweight interfacing, but do this in small increments, and test it first on a prepared scrap “sandwich” of interfacing encased in your chosen fabrics.
- To make sharp folds and creases with heavyweight interfacing, sew score lines wherever a fold will occur. Just a simple straight stitch from top to bottom is all that’s needed to allow the interfacing to cleanly fold.








COMMENT #1
Almost makes me wanna go back to school… almost 😉
COMMENT #2
Love this and want to make a bunch for co-workers. Please create a printer-friendly version to make it easier to print out and use
COMMENT #
Great suggestion Stephanie. We’ll look into it.-Jake
COMMENT #3
What a neat idea! I can’t wait to make some for my granddaughters – they’ll be so amazed!!!!! May even make a few for my super-organized mom. Thanks!
COMMENT #4
Very Cool idea! It will work for quilting committees too!