By Rose Hughes, RavenSpeak Quilts
Young or old, many of us love decorating and refreshing the look and feel of where we live our lives. And the occasion for the re-do doesn’t really matter…it might be the first time your youngest doesn’t have to share a bedroom with her older sister, or it maybe it’s your oldest child’s new college dorm room, or that special place you go to relax when you think nobody’s looking. (What a concept, right?) One quick, easy way to change up the look of a room is to create custom pillows. It is uncanny how you can stitch up just a bit of fabric and completely alter the mood of a room. Magic!
Well, it’s just as easy to amp up the magic and showcase your personality by adding appliquéd words or special designs. Over the last few years, I have been sharing Fast-Piece Applique™, my quick and easy method of making curves and circles. In today’s project, I’d like to show you how easy this technique is for adding a few letters—and a lot of graphic sizzle—to a fun tweens’ pillow. (And don’t limit yourself, because you can use this same technique for adding letters or designs to quilts, wall hangings and just about any project.)
And because I particularly love to upcycle discarded clothes into projects, we’ll be using a discarded men’s button-up shirt in this project as 1) a great way to recycle and 2) as a nifty short-cut to making a finished opening so the pillow cover can be easily removed for washing. Smart³, if you know what I mean!
To make the pillow, you’ll need the following materials, as well as a sewing machine and basic sewing supplies:
Supplies
2 pieces 4-1/4” x 14.5” fun fabric for the top and bottom sections of the pillow top
1 piece 7-1/2” x 14.5” fun fabric for the middle section of the pillow top
1 piece or scraps of fabrics for the letters (minimum 5” x 12”)
1- recycled, clean men’s button-up shirt that coordinates with your other fabrics
Freezer paper (You can usually find this where foil and plastic wrap are sold.)
Yarn that coordinates or complements the chosen fabrics. (Scraps are fine.)
14” pillow form
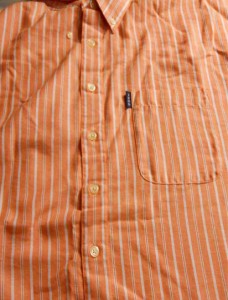 Select the fabrics for the front of your pillow, and find a shirt that will serve as your pillow back. Don’t get wrapped up in being all matchy-matchy here. Contrast can be complementary, too.
Next, cut the fabrics as indicated in the materials list.
Then—keeping the front of the shirt buttoned up, cut the shirt open along the side seams. Press the front of the shirt so it’s ready to be used for the back of the pillow.
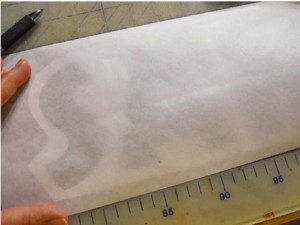 To begin working on the pillow front, you’ll want to work on the section with the letters first. The easiest way to make these big and fun is to use your computer. Open a Word doc, find a font you like and type the letters you wish to use. Enlarge the letters as much as you wish print them out.
Once you have the letters printed out, cut a piece of freezer paper 4-1/2” x 14-1/2” and lay it shiny side down over the area of the letters. Use a fine line marker and trace the letters on to the freezer paper.
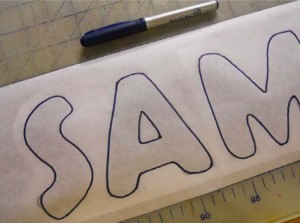 Once traced, cut each letter out of the full sheet of freezer paper, leaving the sheet intact. (In the pictured example, I retained the middle sections of the letter ‘A’ to be used in the next step when stitching the letters.).
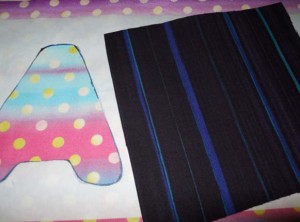 Lay the middle piece of pillow top fabric on the ironing board, center the freezer paper with the letters cut out, press into place. This becomes your stitching guide and template for placement of the appliquéd letters.
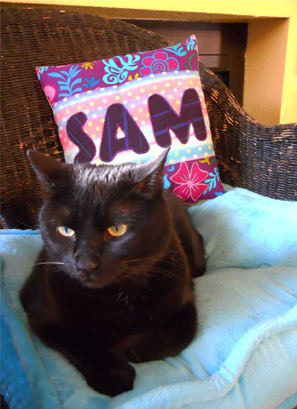
Now its time to select the fabrics for the letters. For Sam’s pillow, I chose a stripe that I could turn every-which-way, adding even more snap to the total look. You’ll want to place and stitch one letter at a time.
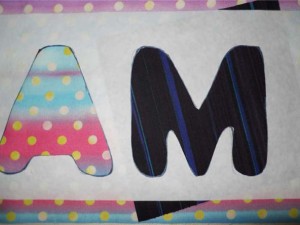 Start by lifting the freezer paper up. Slide the appliqué fabric into place. Then using low heat, press the freezer paper back into place. (Note: The shiny side of the freezer paper becomes lightly fused to the fabric by the iron’s heat.)
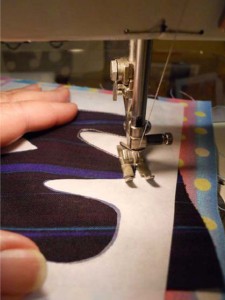 Take the section to the sewing machine, set up for straight-stitch, and stitch the outline of the letter, just along the inside edge of the freezer paper.
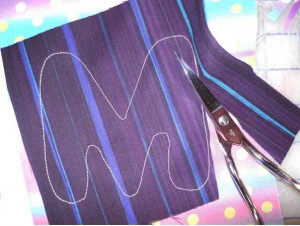 Once stitched, fold the freezer paper back and trim away excess fabric around the outside of the letter, getting as close to the stitching as you can.
Repeat these steps for each of the letters. When you stitch the “A,” don’t forget to put the center back into the letter, this time stitching around the outer edge of the freezer paper. Make it wonky, if you wish.
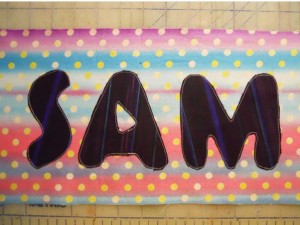 Once all the letters are appliquéd, remove the freezer paper and press the entire piece.
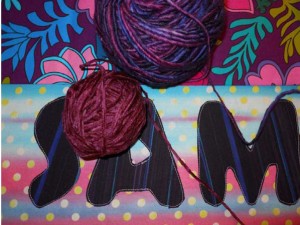 Next, you’ll want to choose yarn that work with your fabrics for the couching, or decorative stitching. (Couching is a decorative technique created by hand- or machine-stitching braid, yarn or ribbon to give emphasis to a shape’s outline.)
Once selected, couch—or stitch down–the yarns along the stitched letter outlines, using a wide, open zig-zag stitch. (Practice this first on a scrap.)
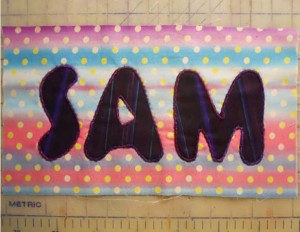 With the couching completed, press this center section from the back.
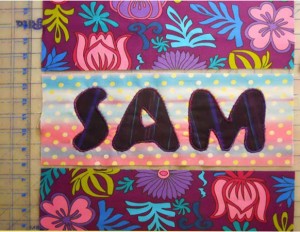 Now lay out all three sections of the pillow front, with the appliquéd piece in the middle. With right sides together, match the bottom of the top section to the top of the middle section. Pin and sew a straight-stitch seam ¼” from the edge. Press.
Repeat along the edges where the middle and bottom fabric pieces meet. Your pillow top is now stitched together!
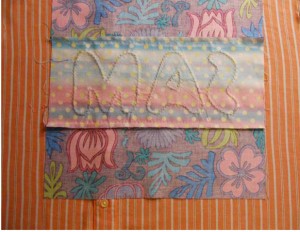 Now lay out the cut section of the shirt–front button side up–on your cutting surface.
Then lay the pillow top right side down on top of the shirt. This is when you can decide exactly where the opening will be positioned on the pillow back. (And maybe you even incorporate the pocket onto the back. Kids love having a secret pocket!)
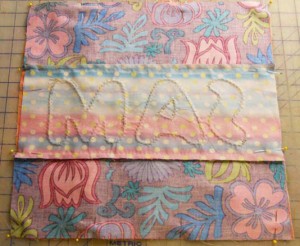 Once you have the pillow top positioned where you want it, trim the two pieces to the same size. Pin along the outside edges and stitch a 1/4” seam along the edge.
Remove all the pins and clip off the corners to remove bulk. Lastly, open the buttons and turn the pillow cover right-side out.
Stuff with a 14” square pillow form, and your custom pillow is ready to use.
(Want to know more about Rose? Go here…)

COMMENT #1
That is such a a cool idea! I wish I had time to dream up cool stuff like that. But even if I did have time, I highly doubt I’m that creative.
Cute project!
COMMENT #2
What a great way to keep the letters where you want them. And I like having the shirt buttons on the back – easy peasy! Thanks Rose, for a terrific tute!!
COMMENT #3
I just gotta say…..Im’ going to my closet right now and looking for shirts I no longer wear.
And this is a GREAT way to pass on a ‘little bit of a person’ too!
Thank you, Rose Hughes, for a great project. Thank you GenQ for continuing to bring us great designers.