

In our Fall 2012 print issue, quilt goddess Sarah Fielke gives us a fun little doll quilt that uses improvisational piecing. However, if you’re strictly a by-the-pattern sewist, freedom can be a little intimidating. We can help you with that. GenQ technical editor Vicki Tymczyszyn has prepared a two-part tutorial that demystifies this free-wheeling technique. Part 1 (see post on Sept. 7) features improv string piecing. Part 2
By Vicki Tymczysyn
The second method is used for making a wonky square block. It has been used by several popular designers (Buggy Barn, Abbey Lane Quilts, Star Gazey Quilts and Elizabeth Hartman, to name a few) and it can be a lot of fun.
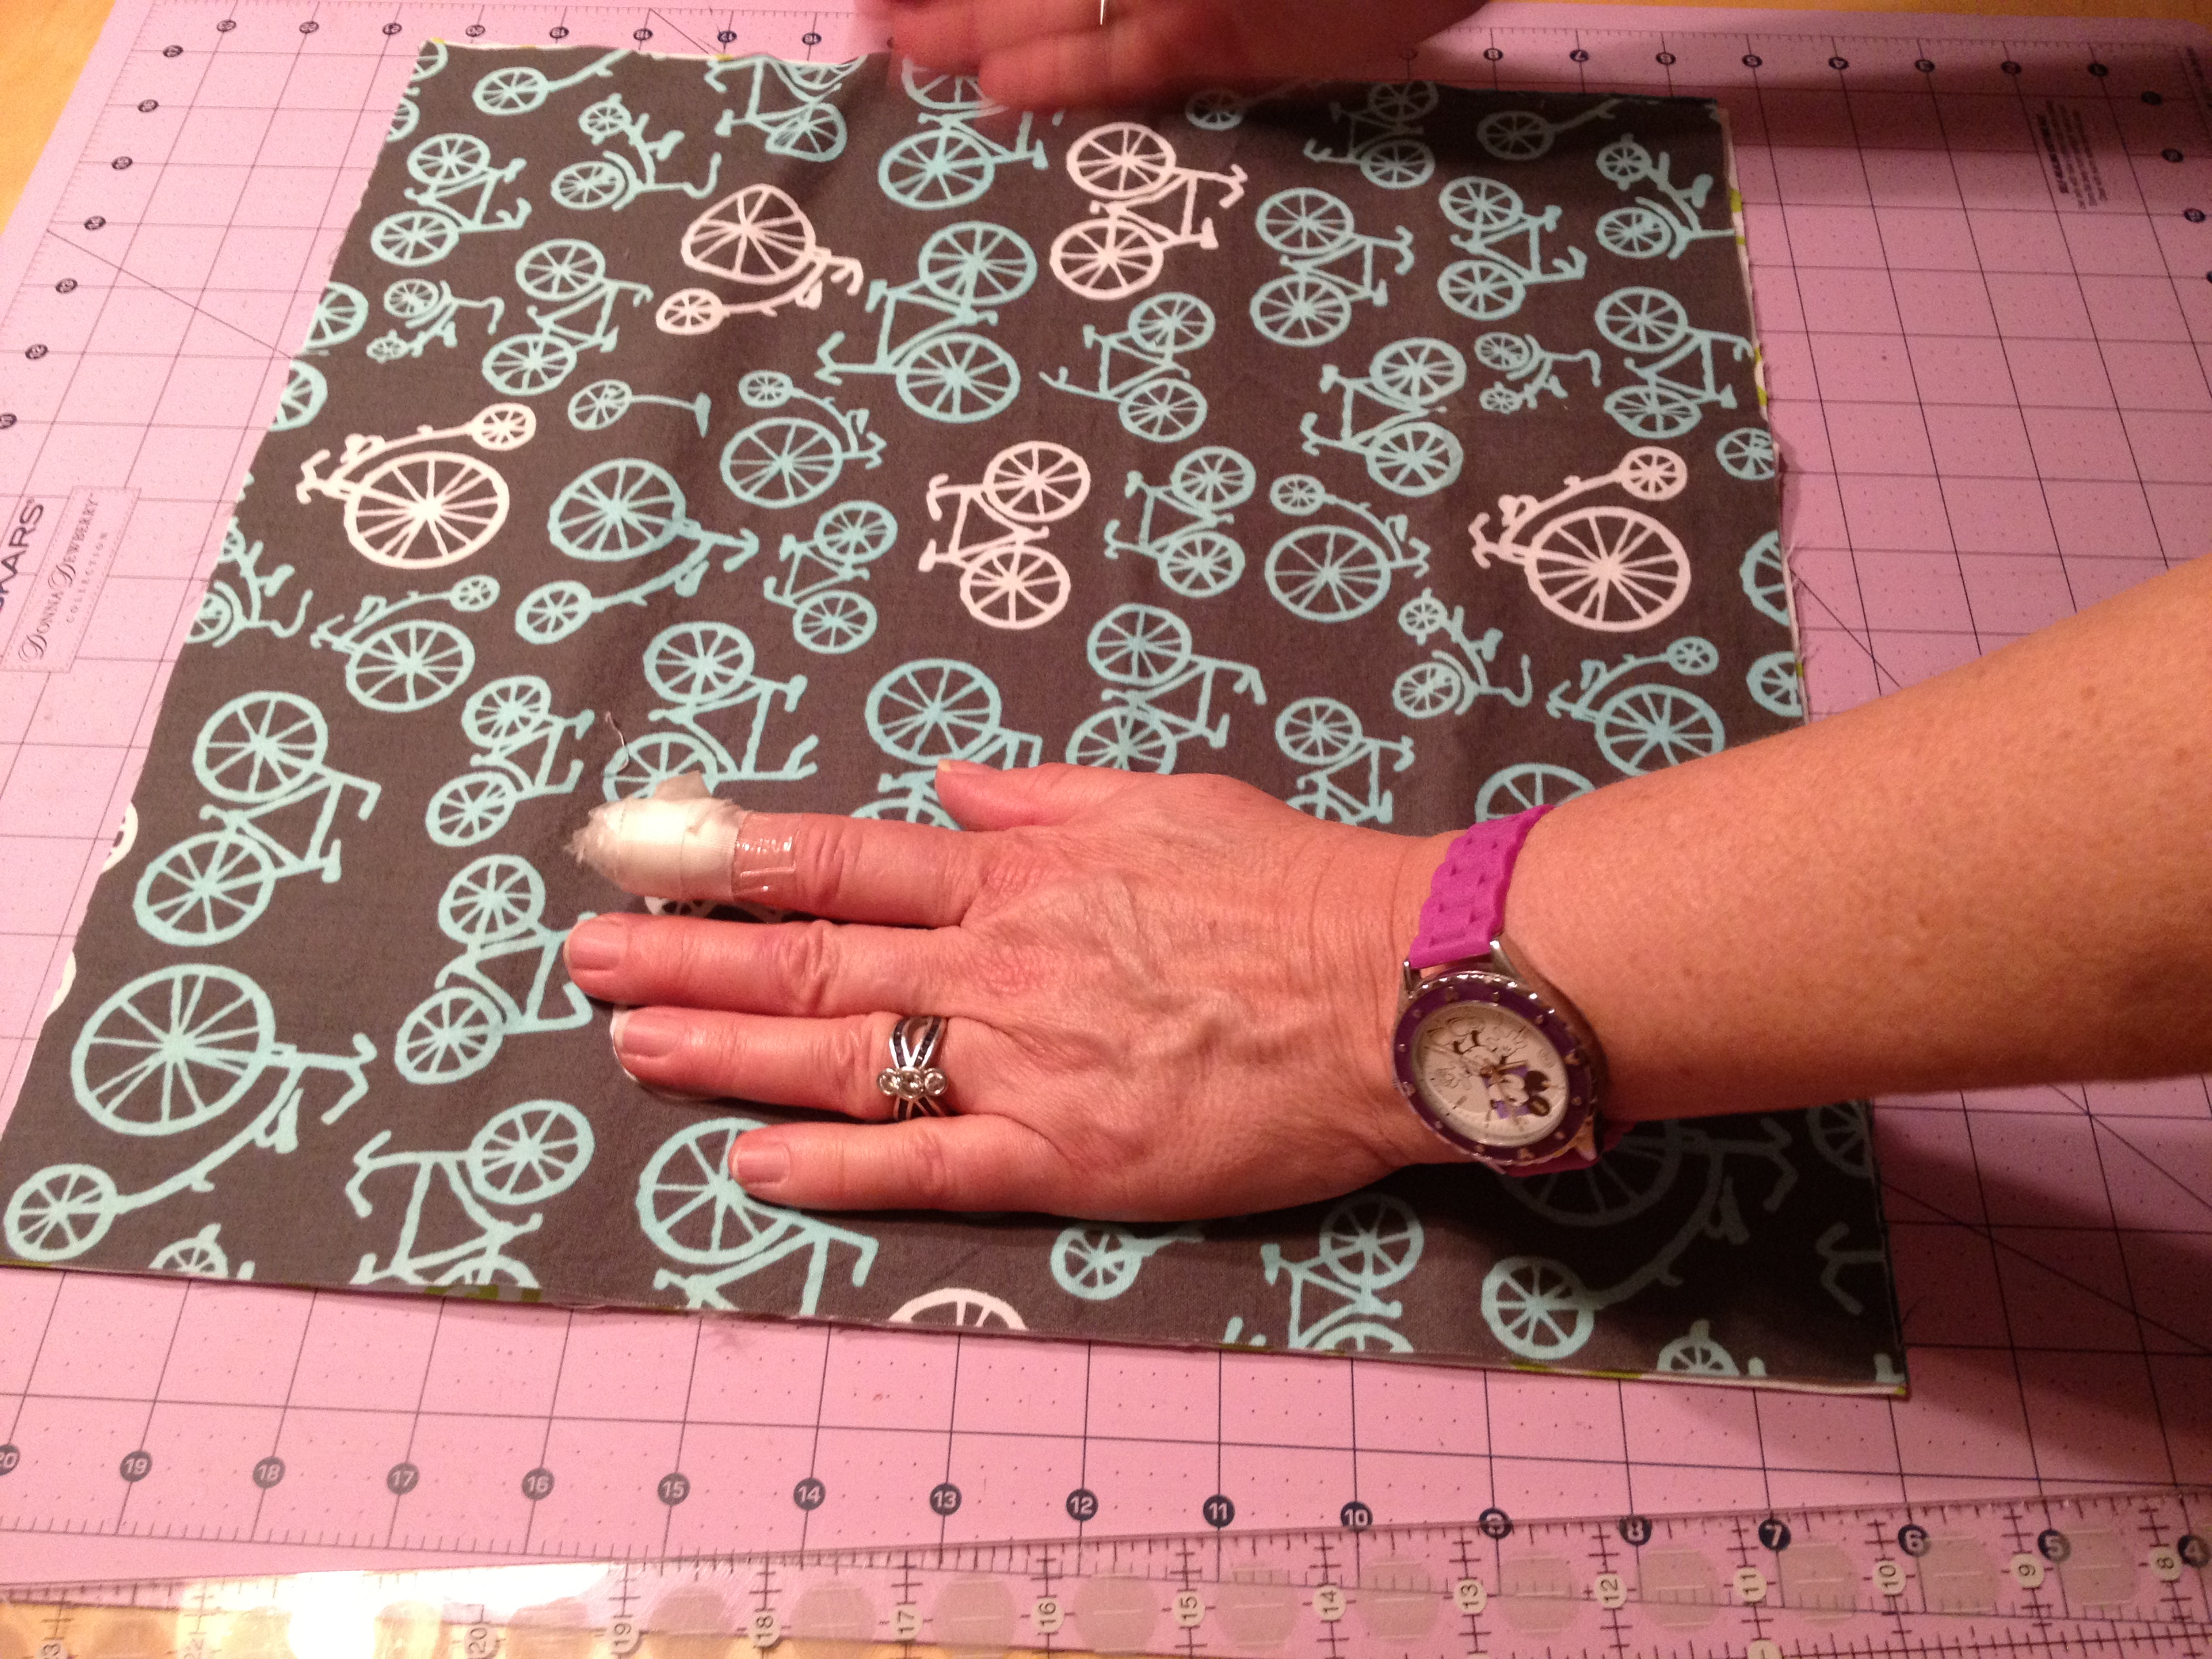
1. Start with 15” squares of 3 fabrics.
2. Layer them one by one, right sides up, and make sure all edges are even.
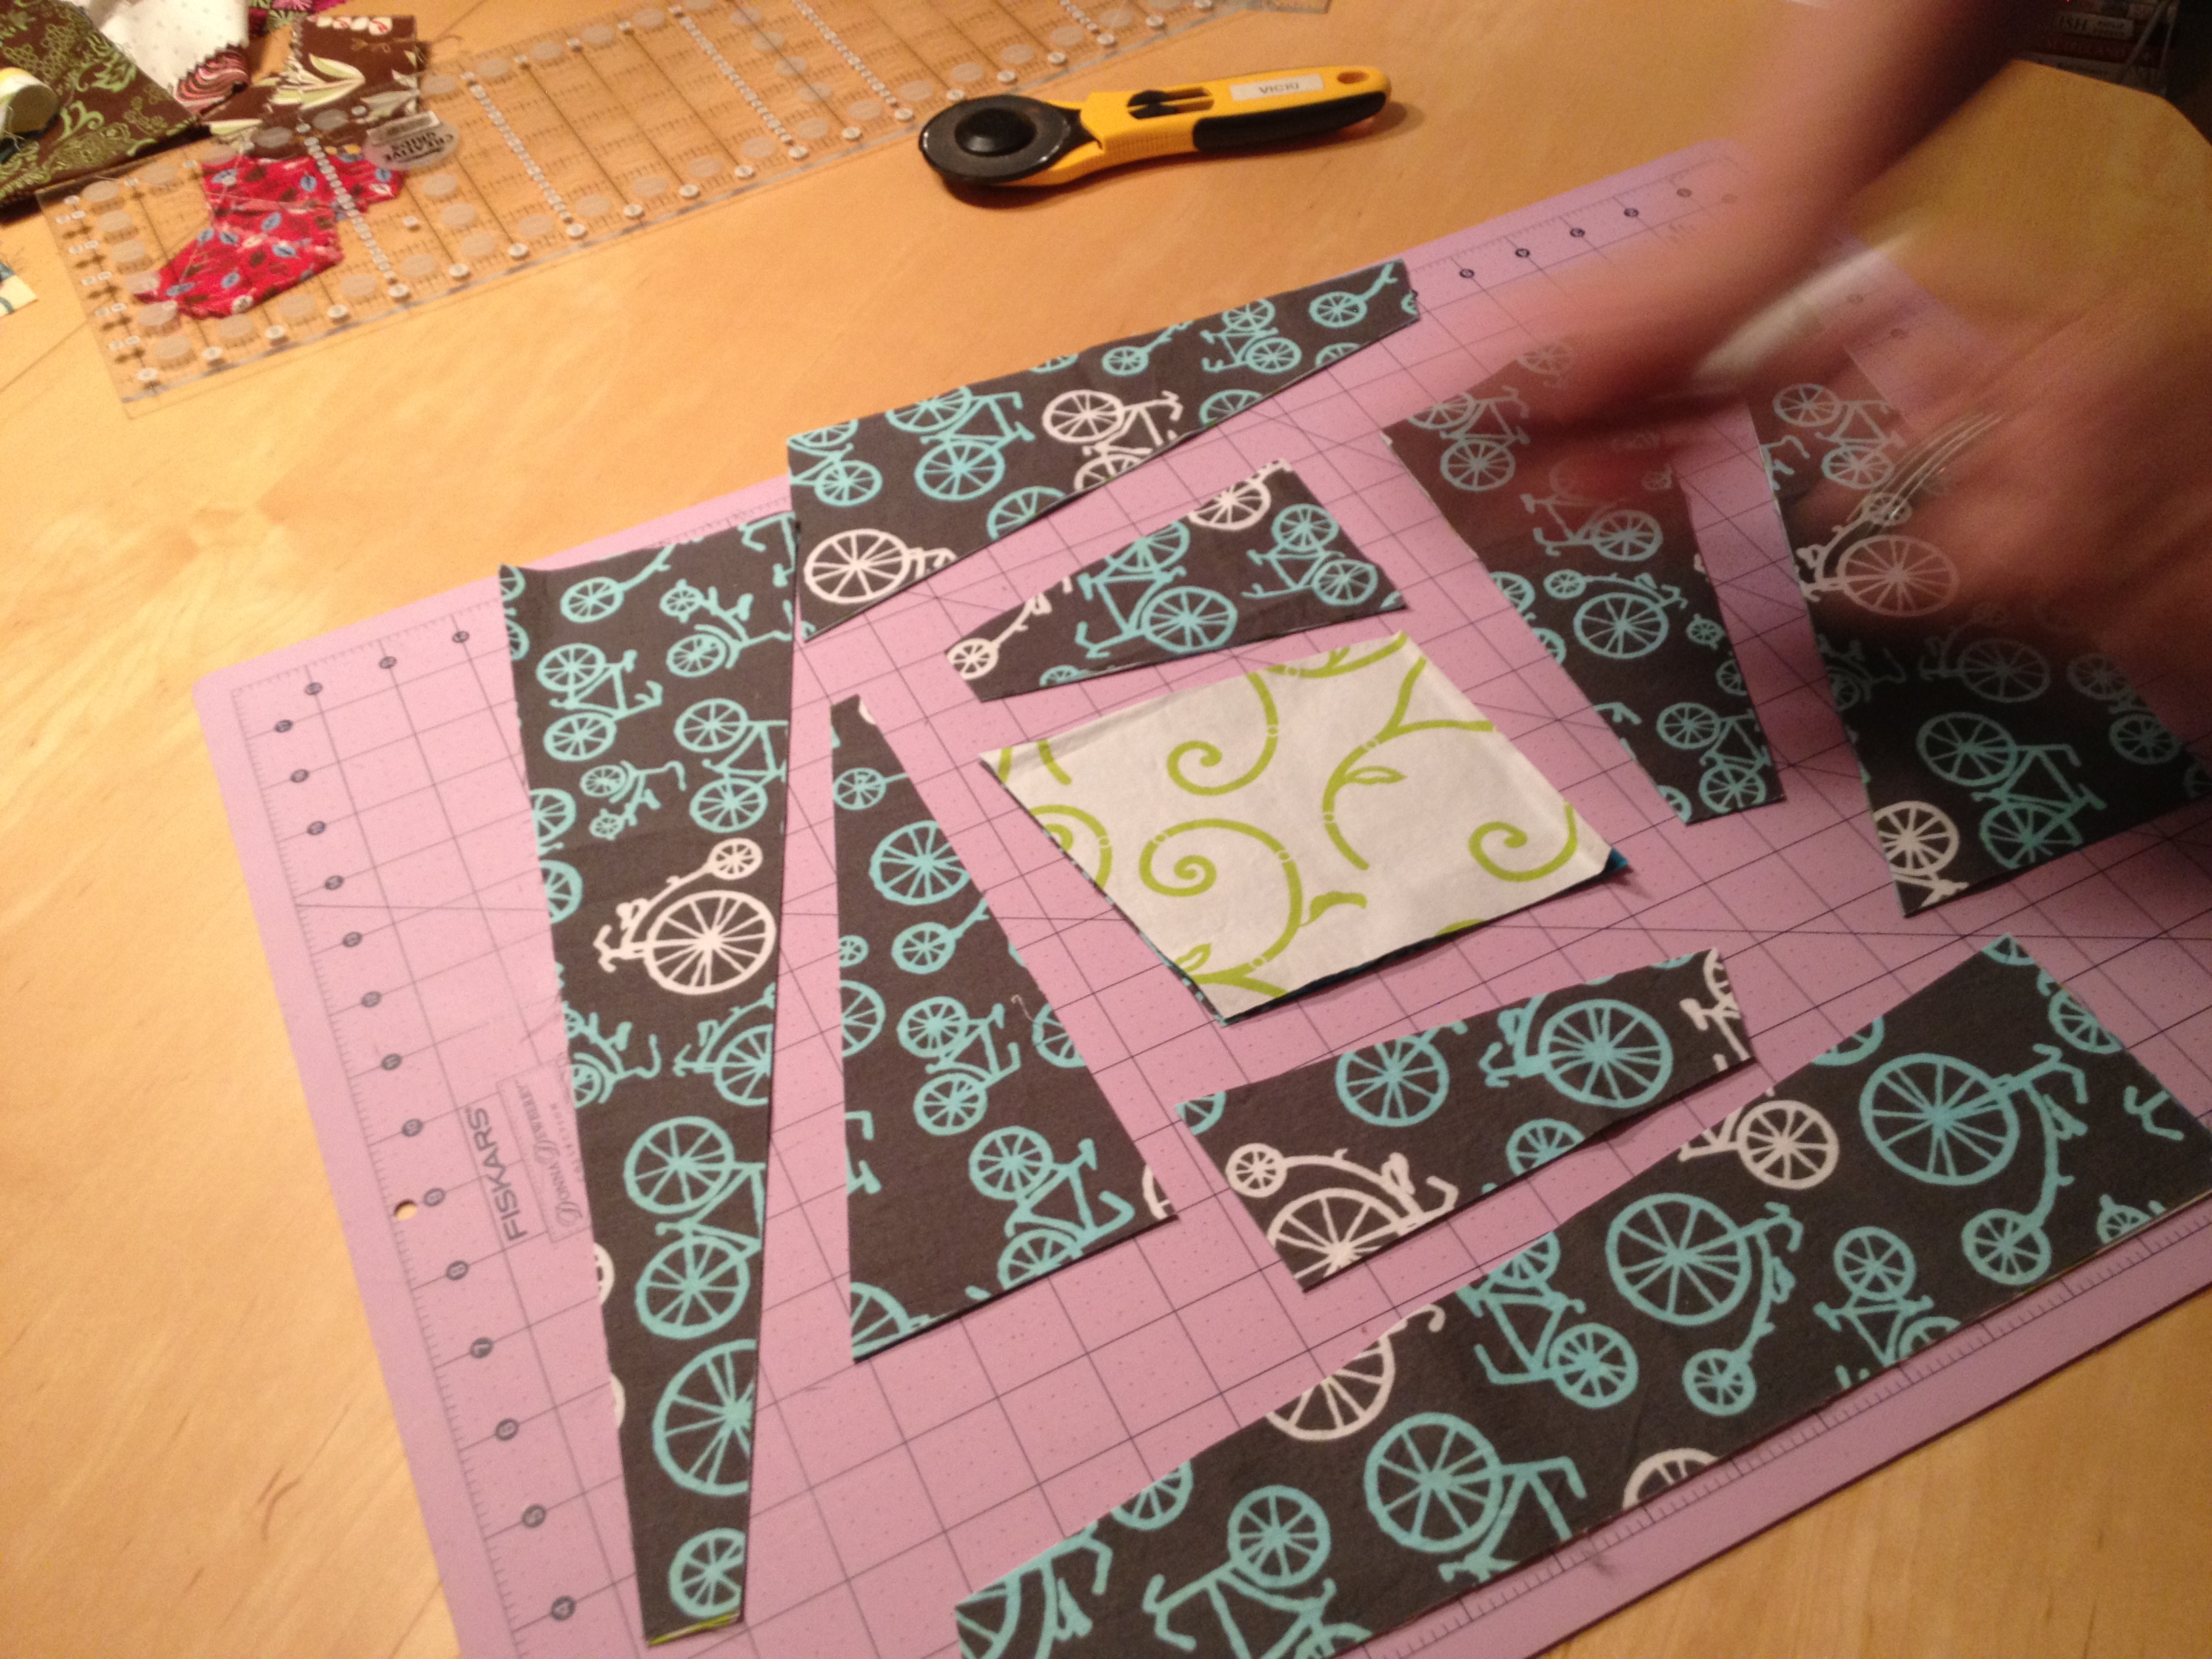
3. Using a long acrylic ruler and a rotary cutter, slice through all layers (not your fingers, though) from one edge to the other, along one side of your stack. You are making a strip, so don’t cut through the middle. Make the angle of your ruler as wonky as you like, but remember: a little wonk goes a long way.

4. Gently move that stack of fabric out of the way.
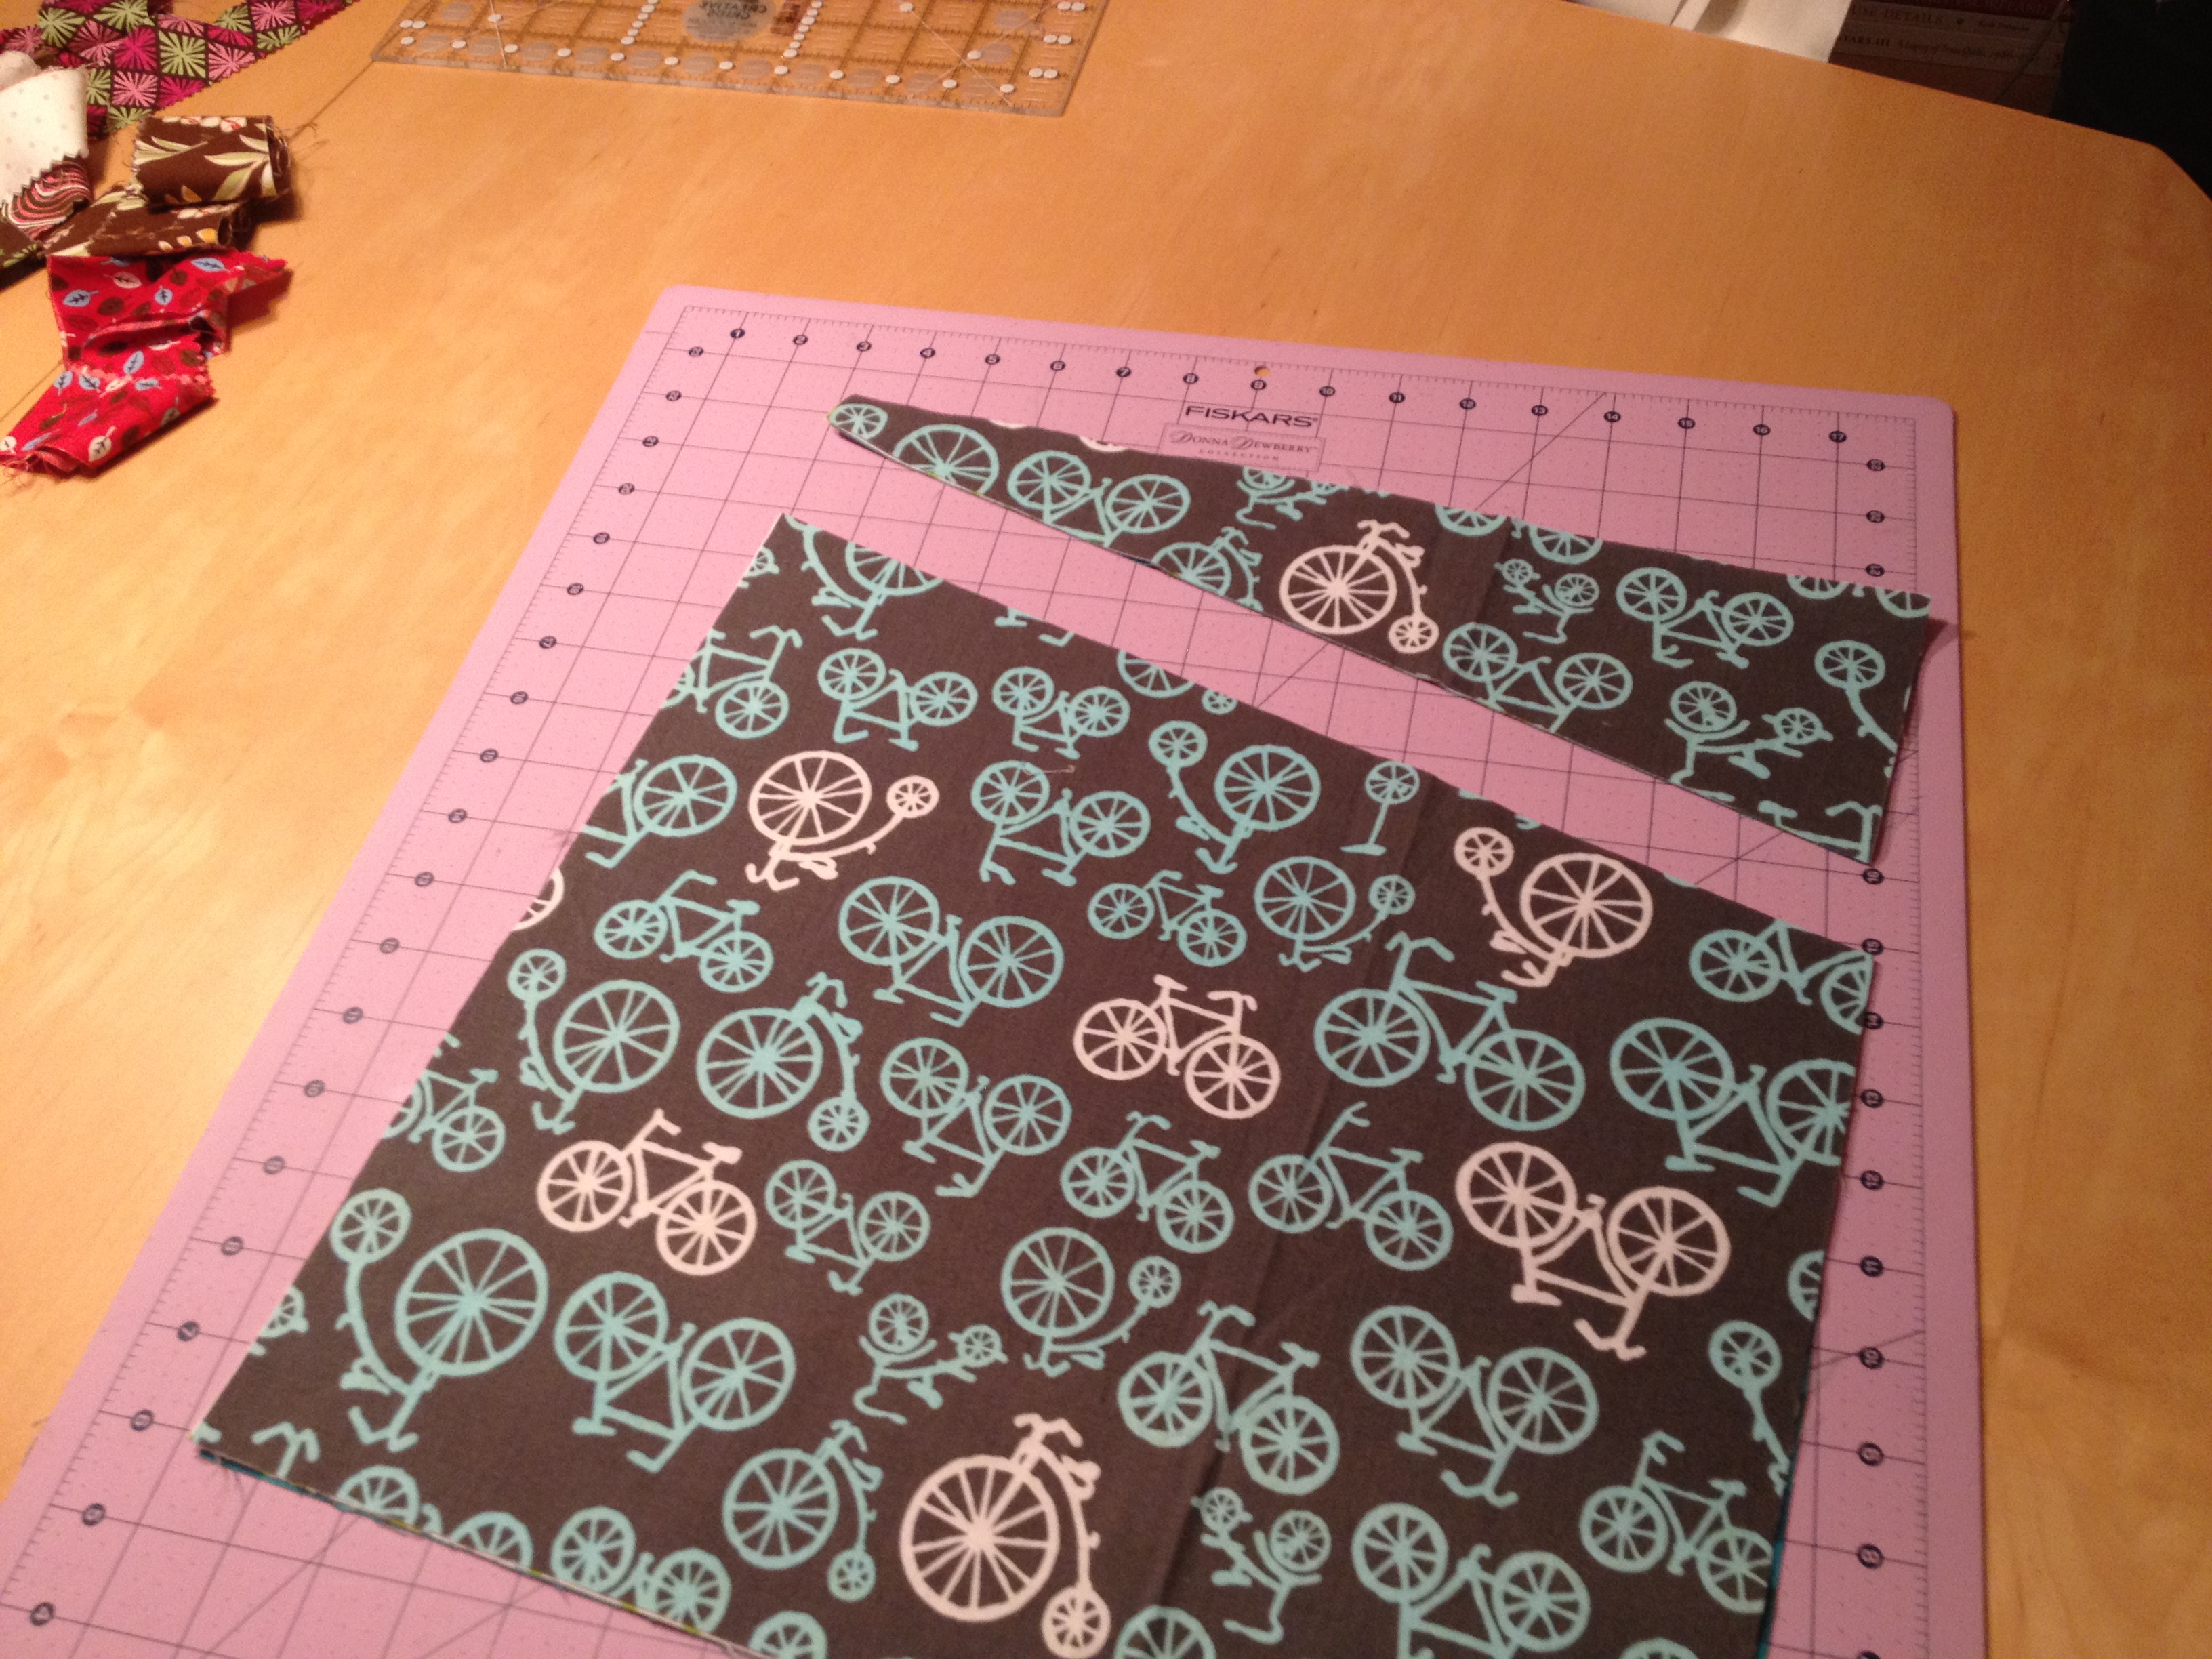
5. Rotate your cutting mat 90 degrees and do it again on the remaining large block. The angle is not critical, but make it somewhat deep/very angled, or shallow/less angled, whatever strikes your fancy.
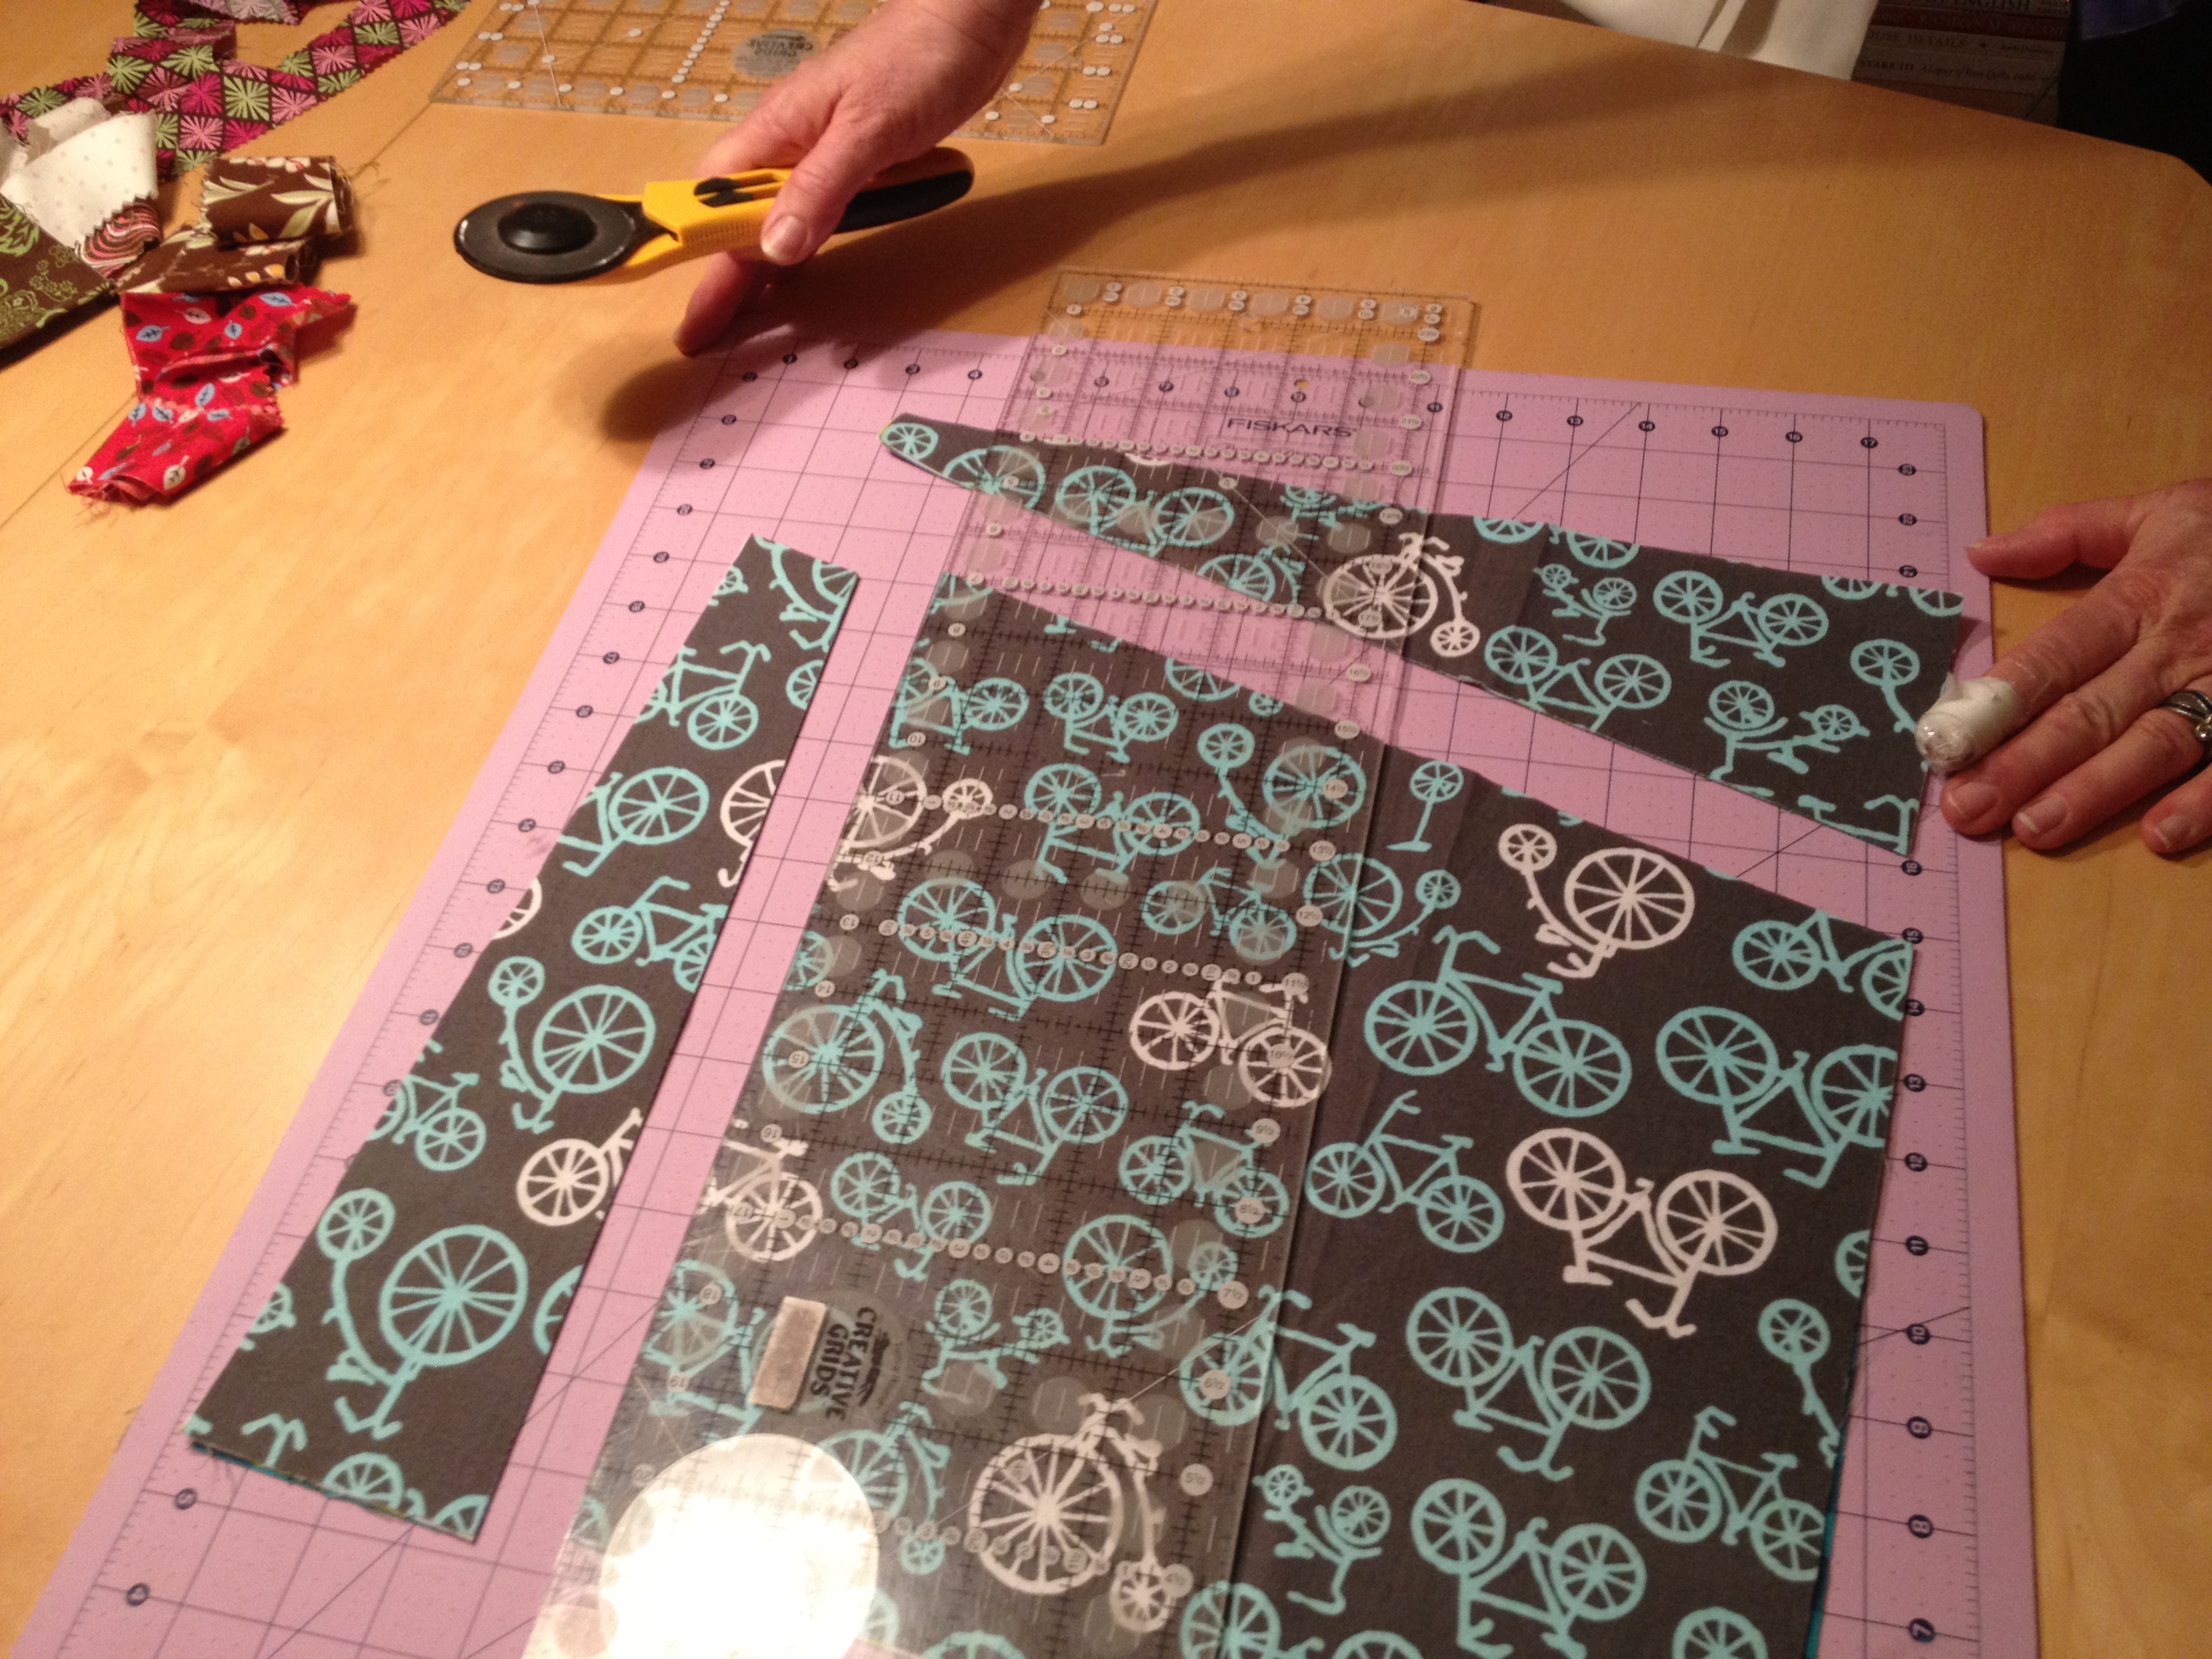
6. Slice all around your block on all 4 sides twice. You will be left with something that looks like this.
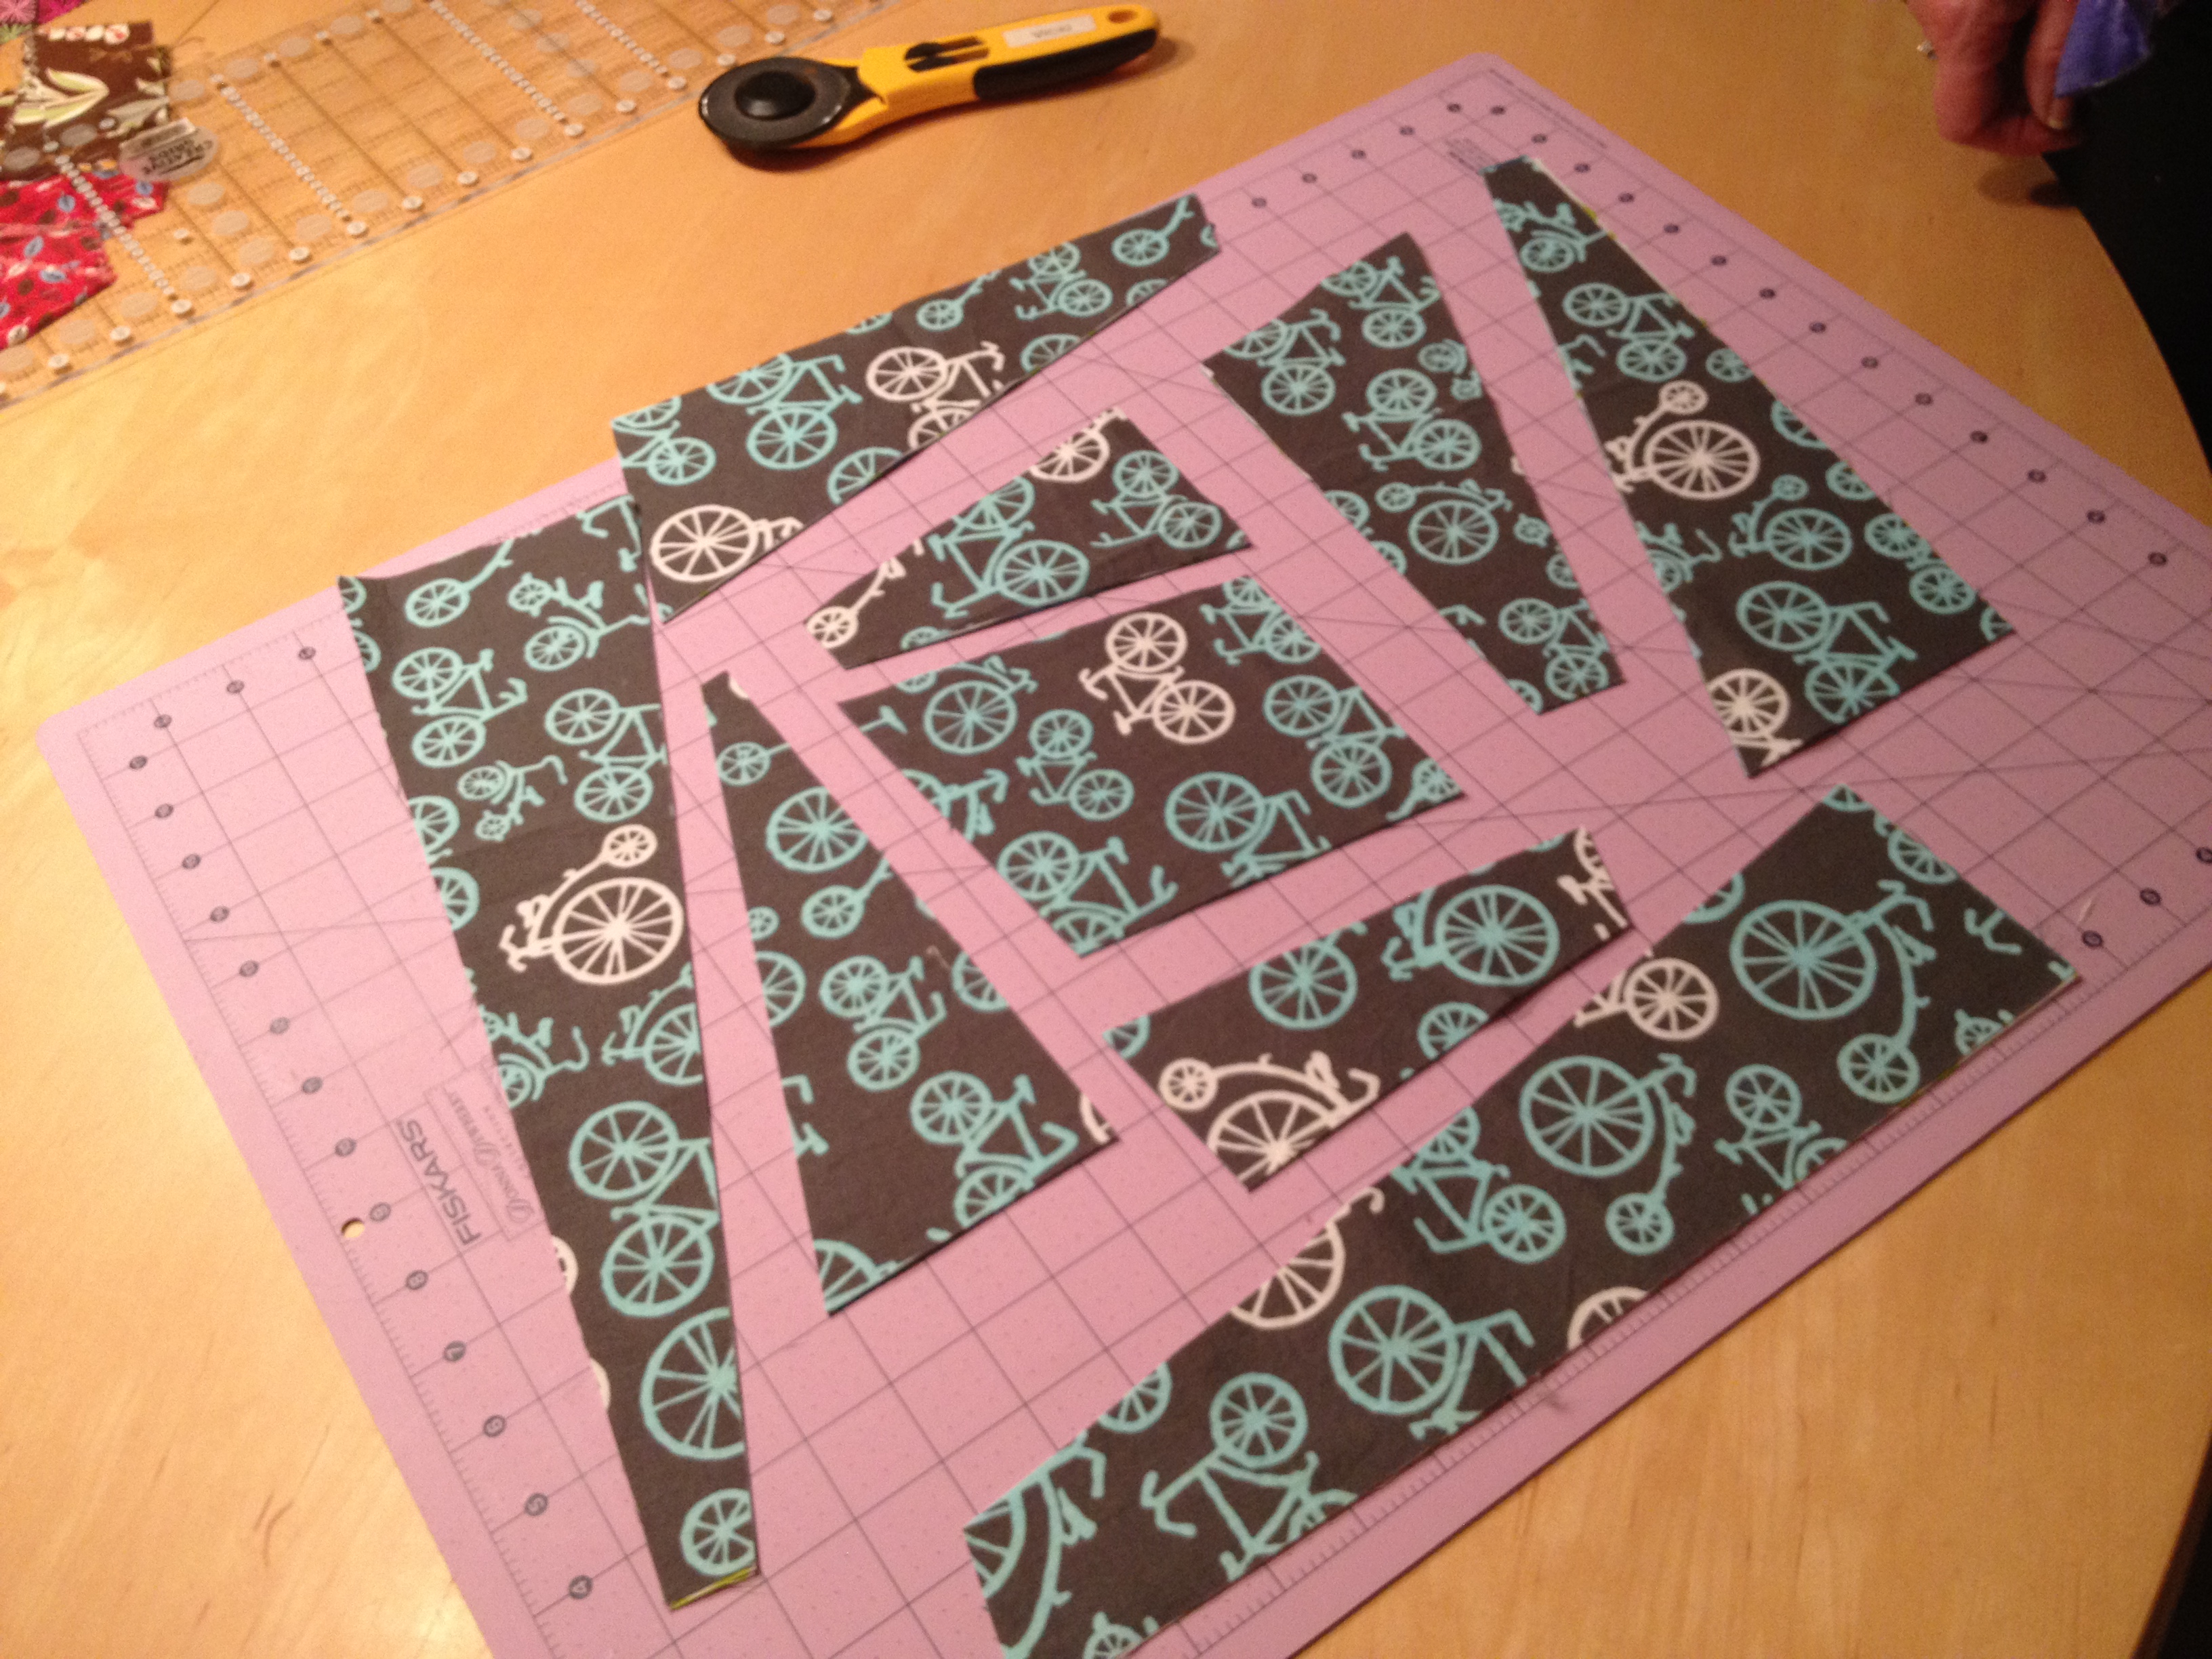
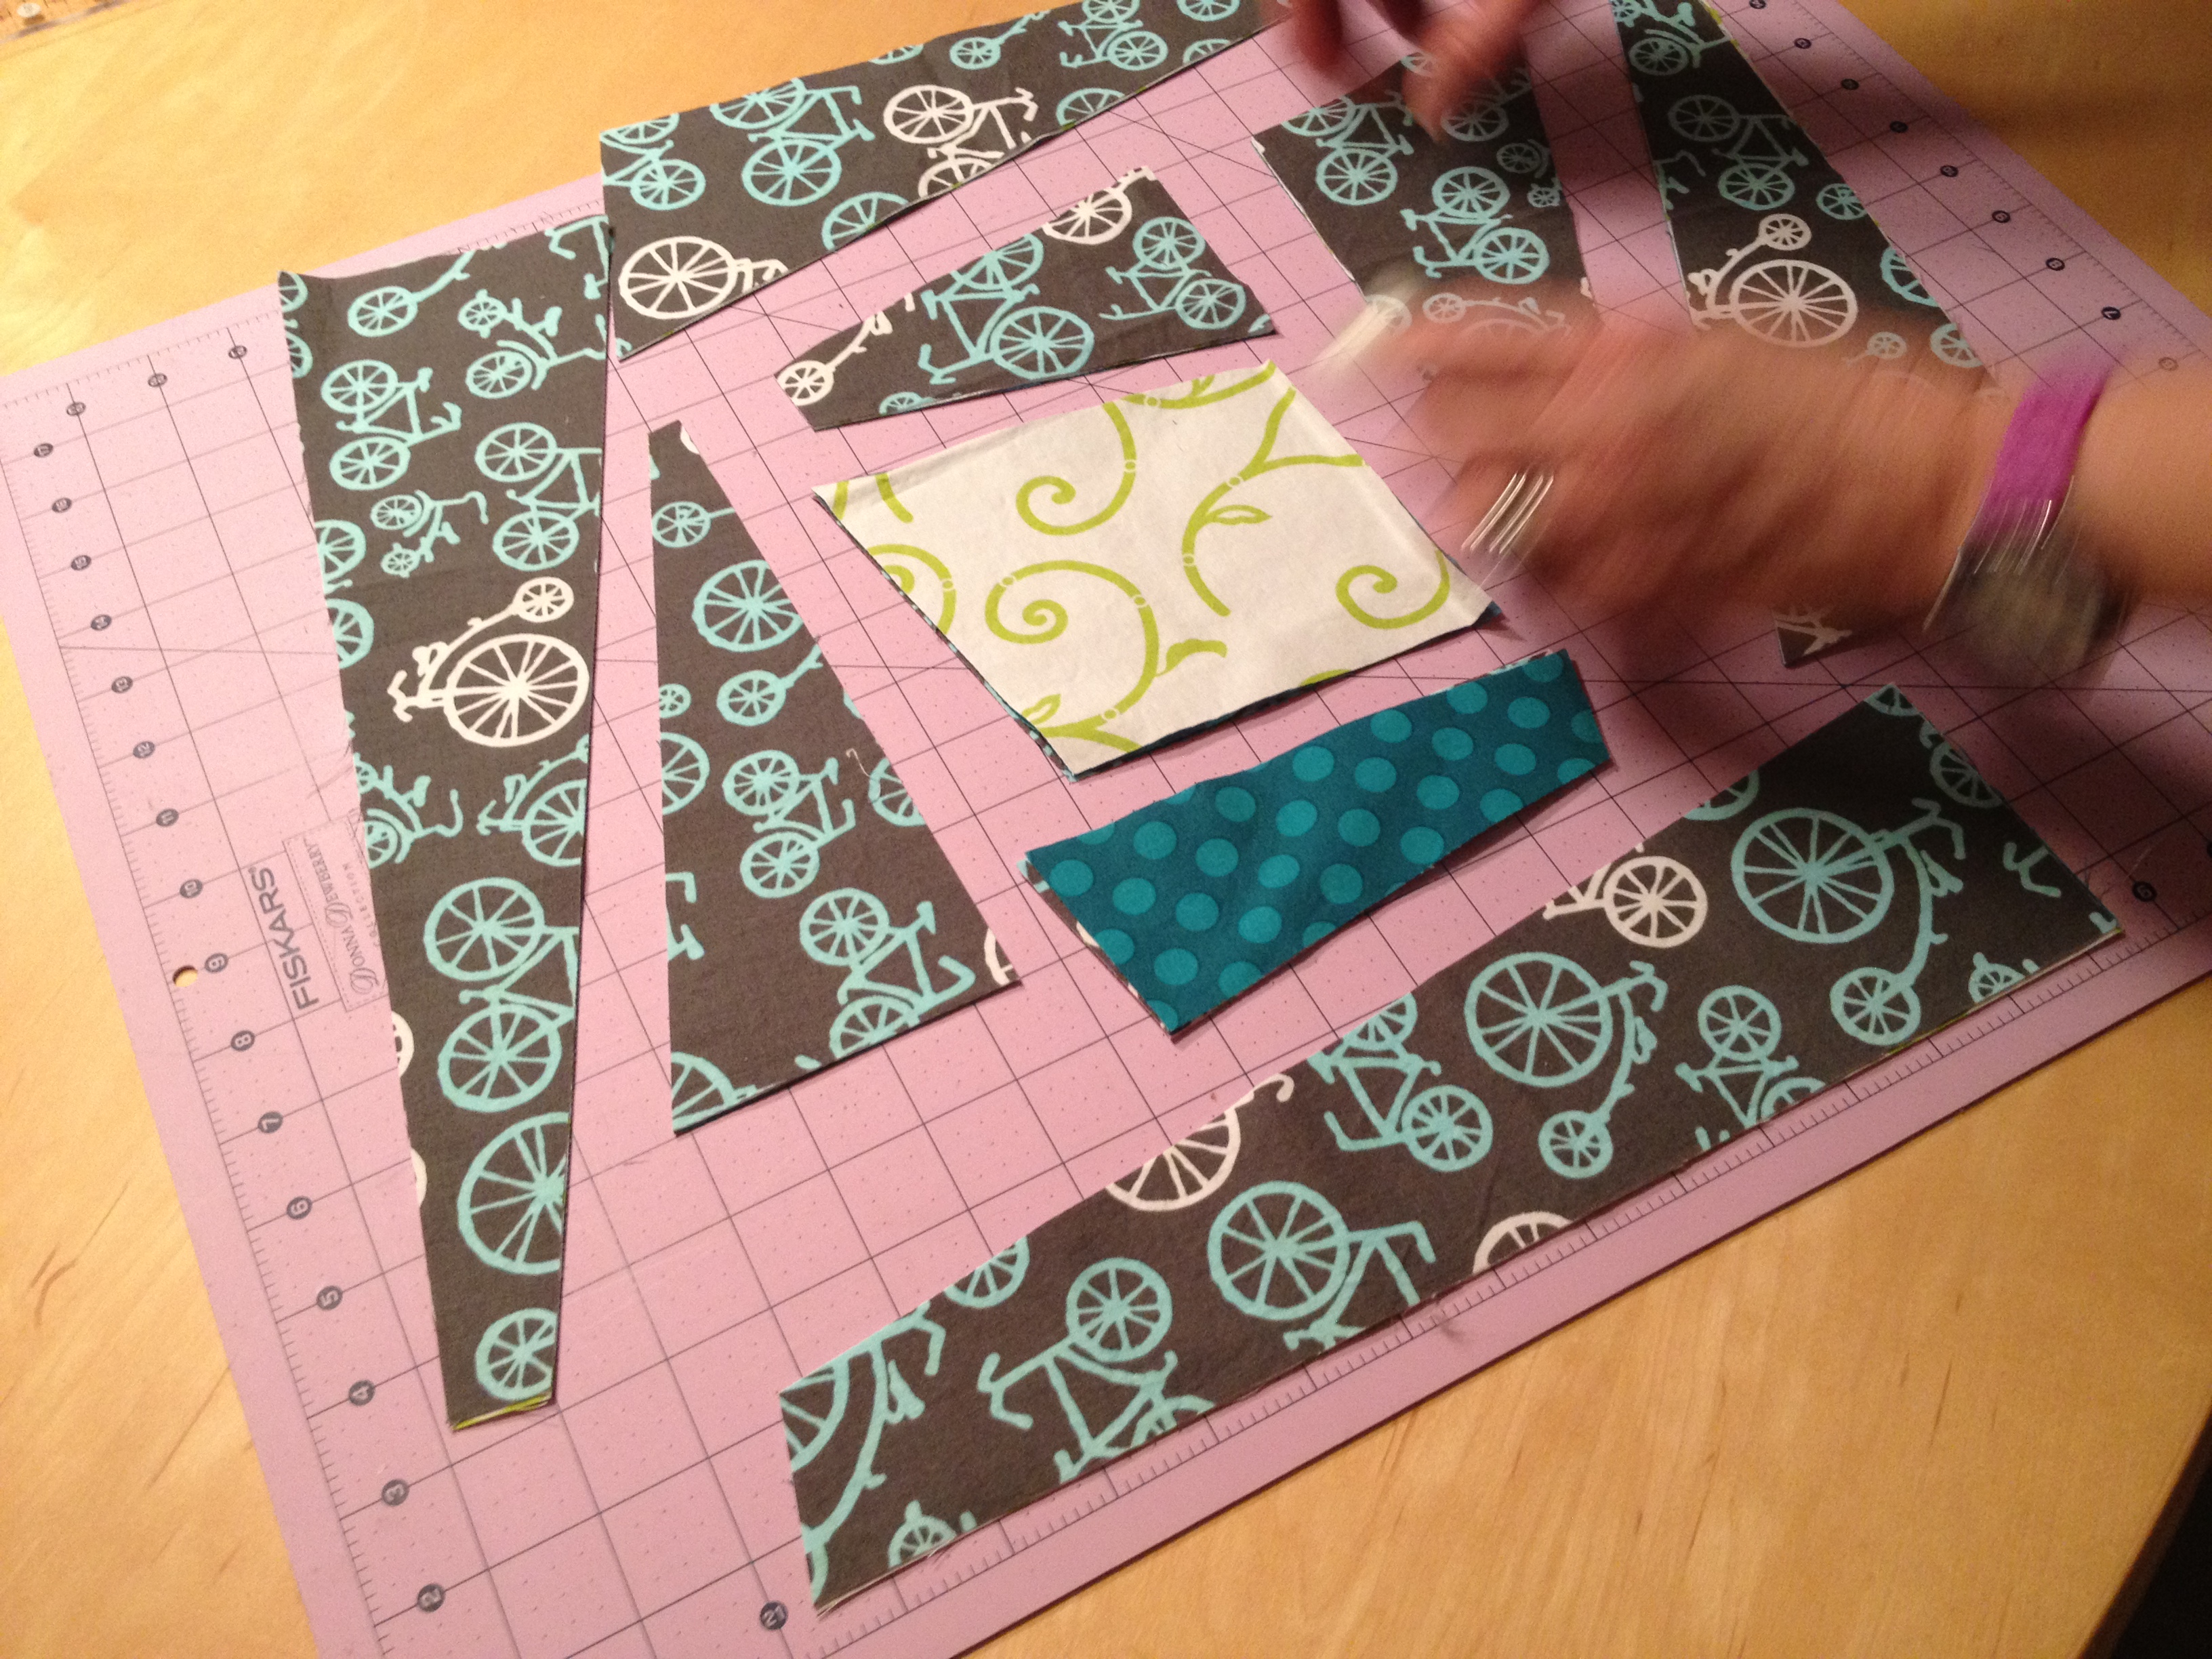
7. Now shuffle your fabrics. Take the very outside 4 pieces and put them on the bottom of their stacks. Take the center top piece and put it between the other two fabrics. Realign the pieces and take a look at your new arrangement. Every layer should have 3 different fabrics. Make adjustments if you forgot to move something.
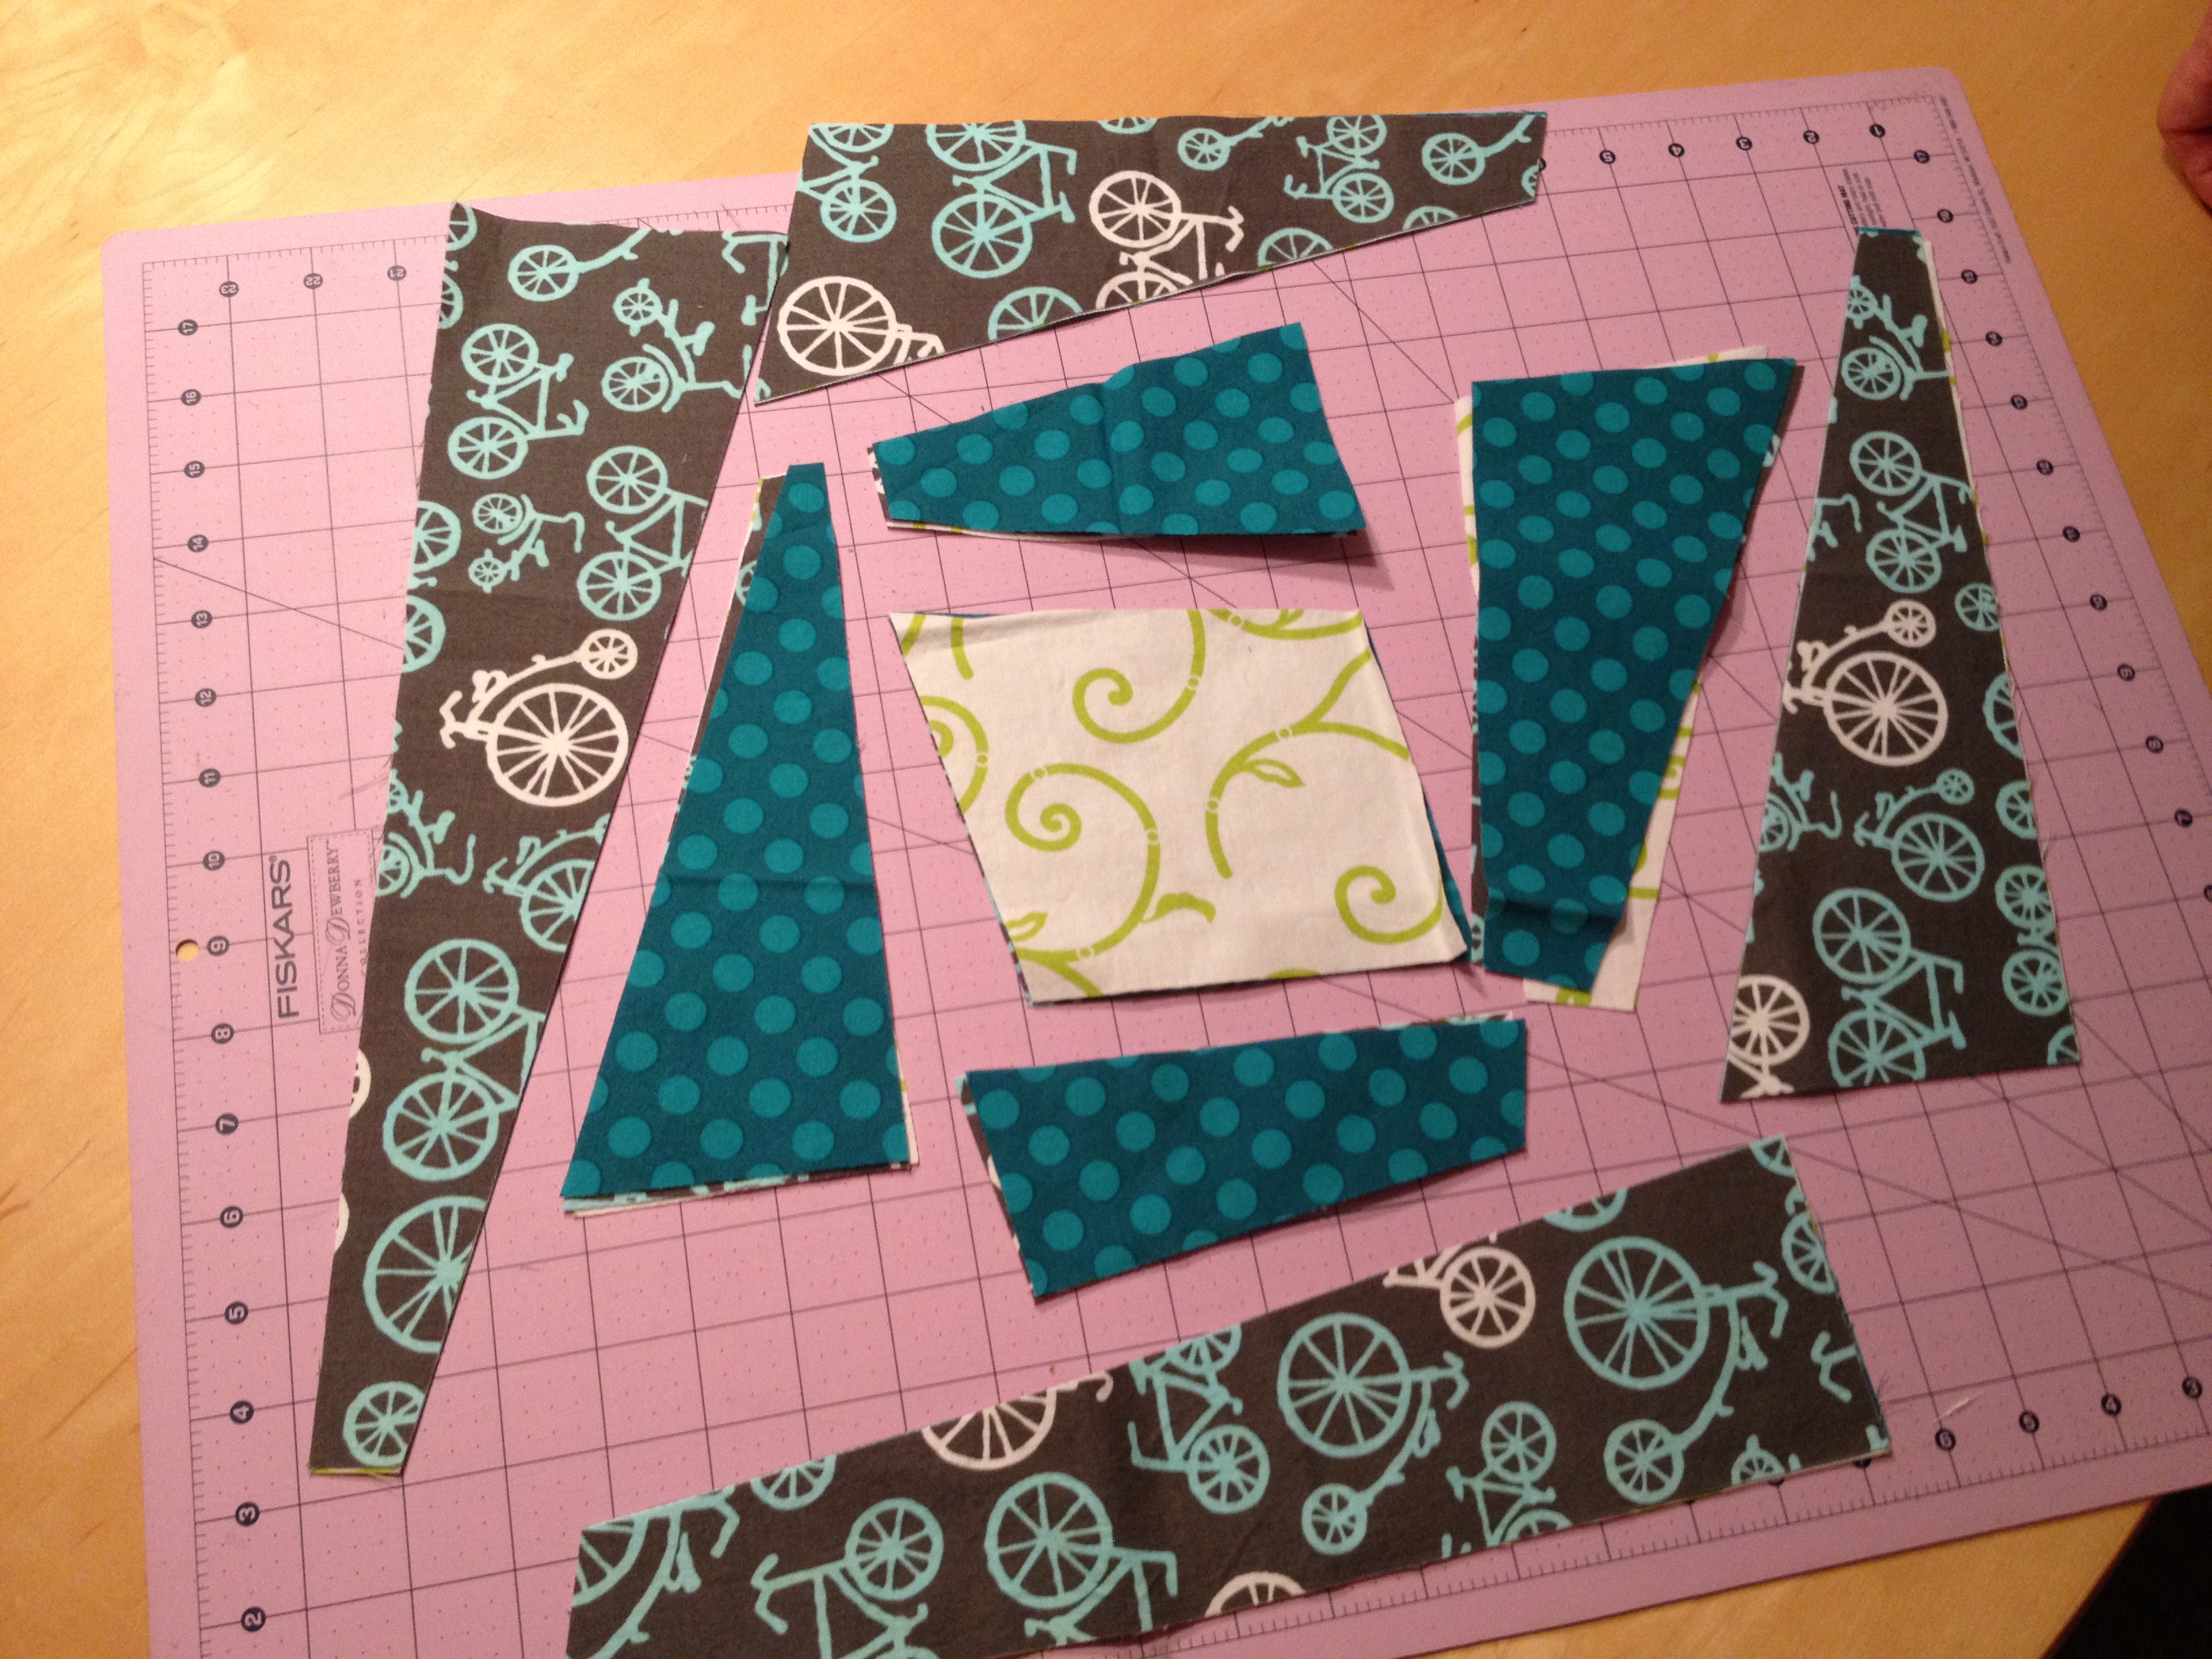
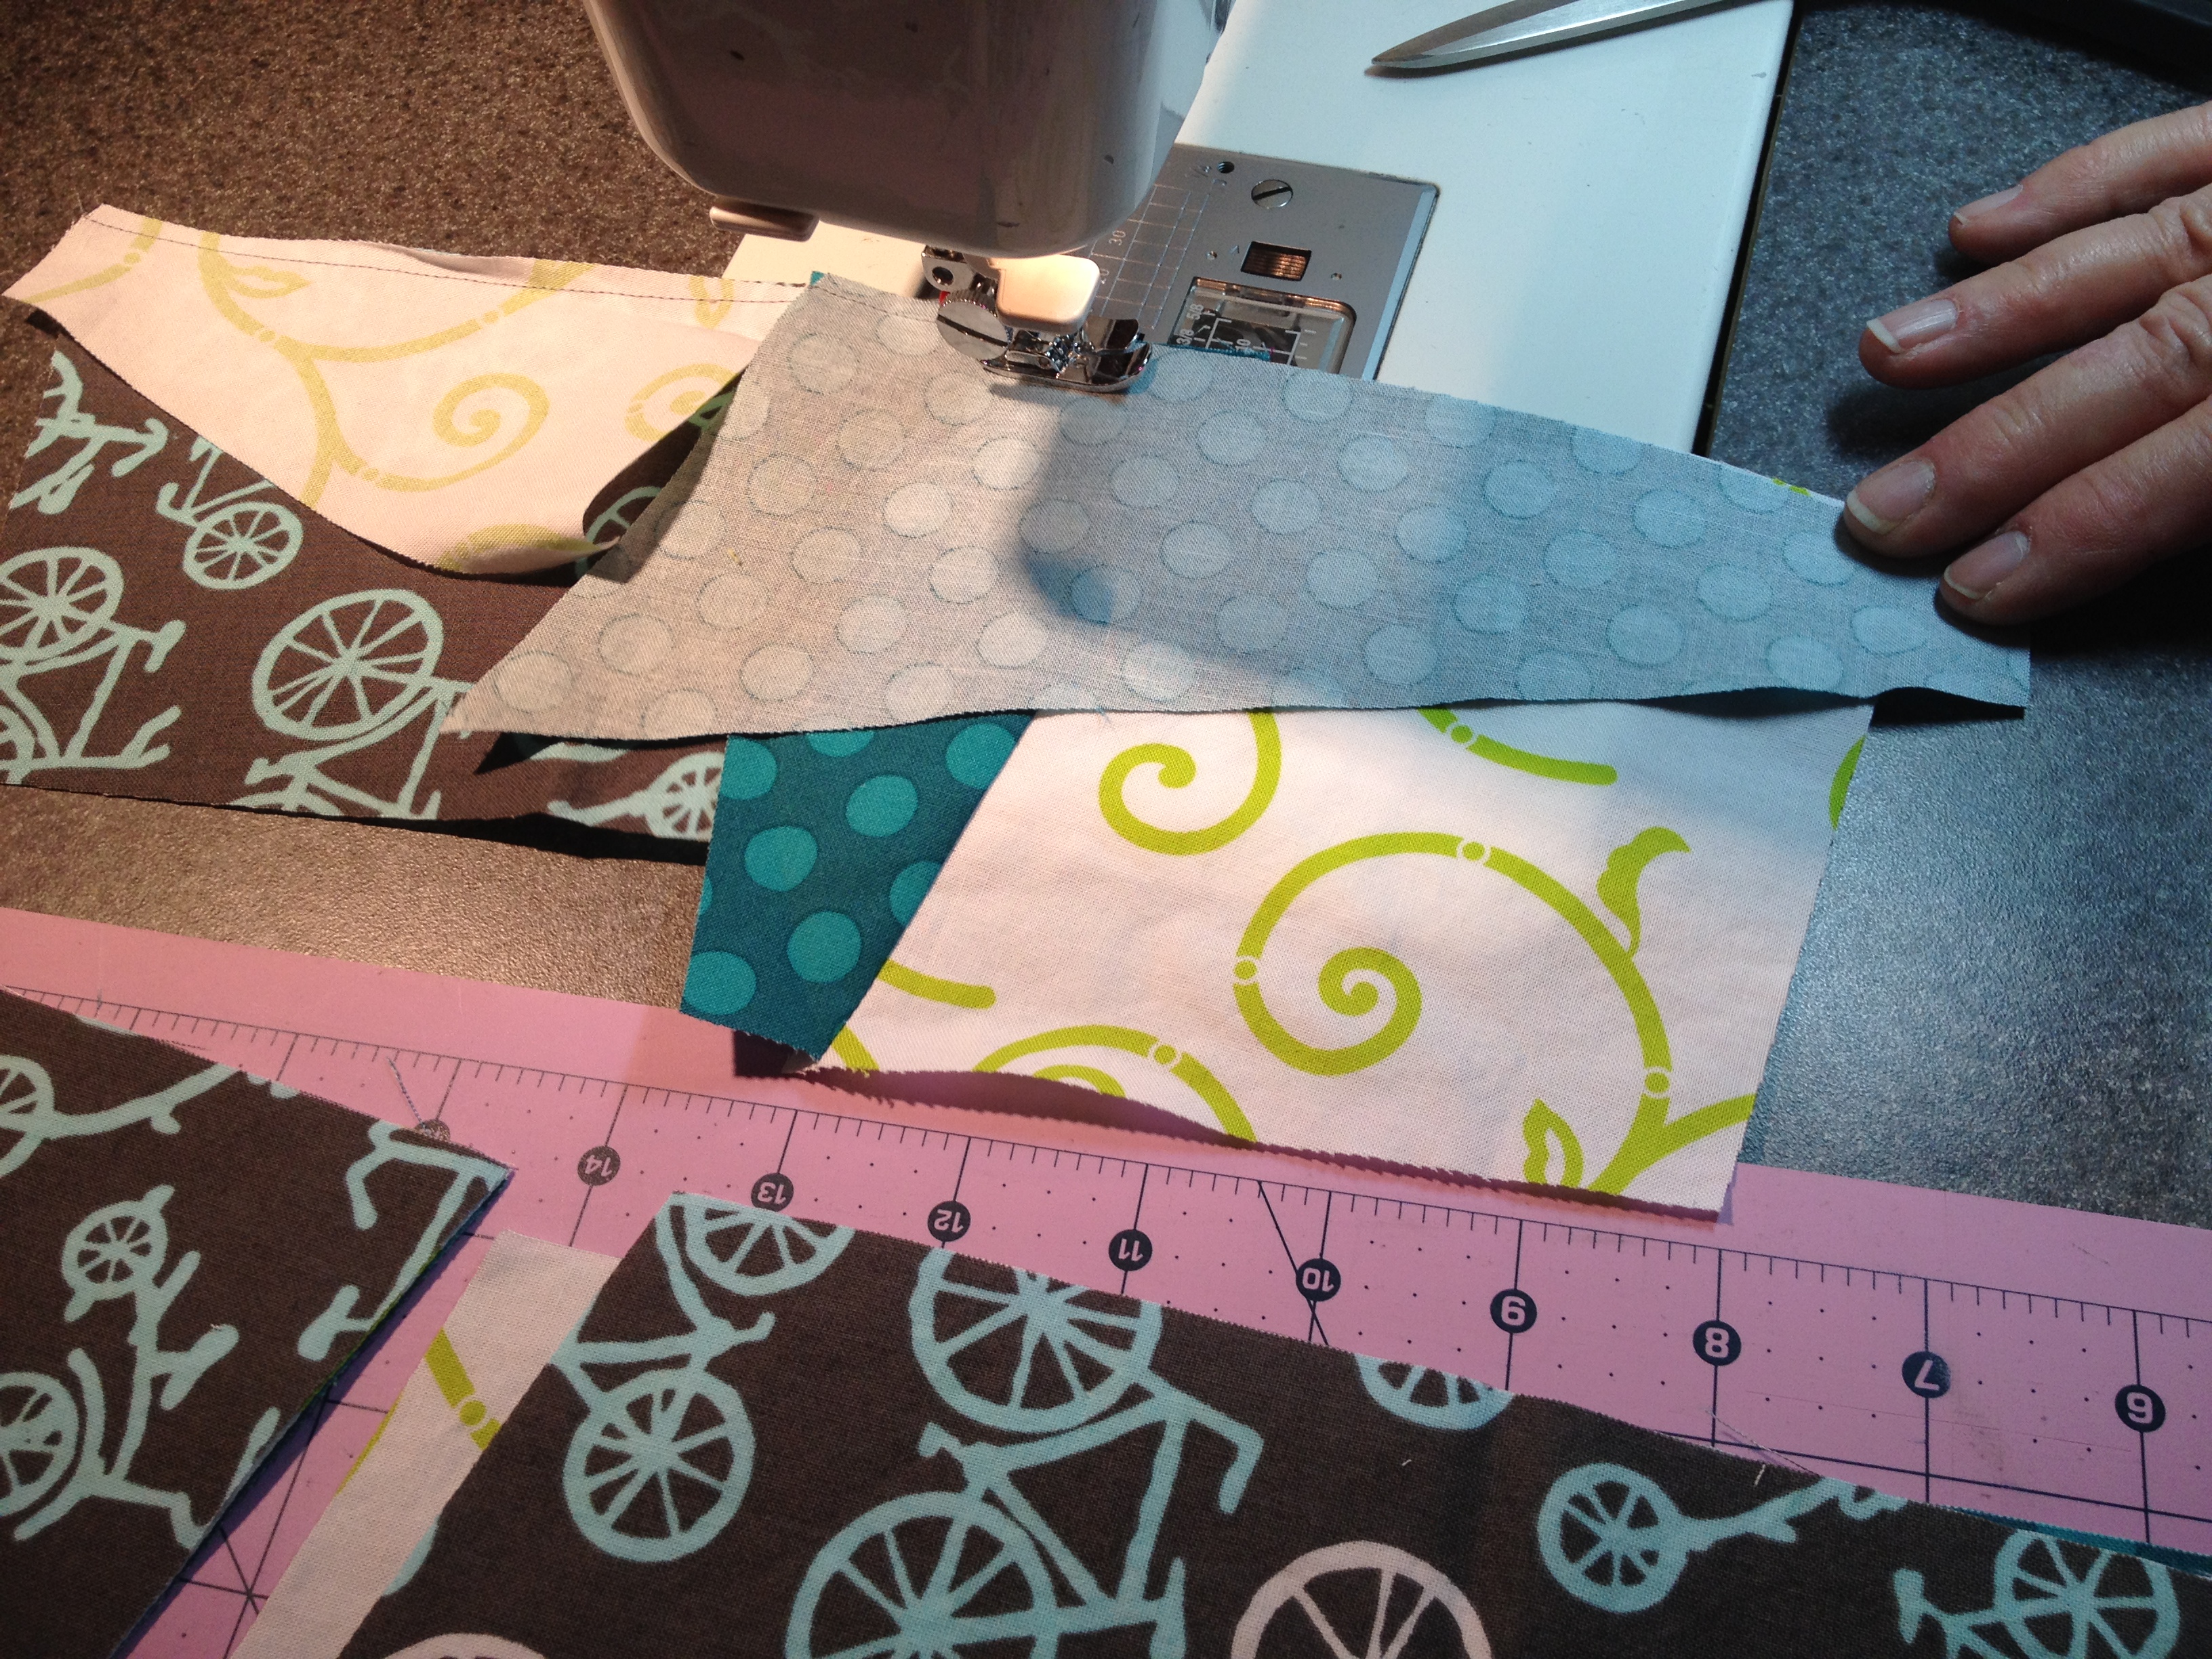
8. Now, sew each layer back together in the reverse order, from the last cut on the inside to the first cut on the outside. Start by sewing piece 1 to piece 2, flipping piece 2 down over piece 1 so right sides are together. Press the seam, and add piece 3, continuing in rotation around all the pieces.

9. Your angles may look funny, but try to line up the beginning of each 2 pieces at the ¼” seam line. As you sew the additional pieces back together, you will have fabric left over at the end of the block, you can either trim it out of the way, or trim it after your piecing is done. You just want to eliminate any excess bulk for quilting later.
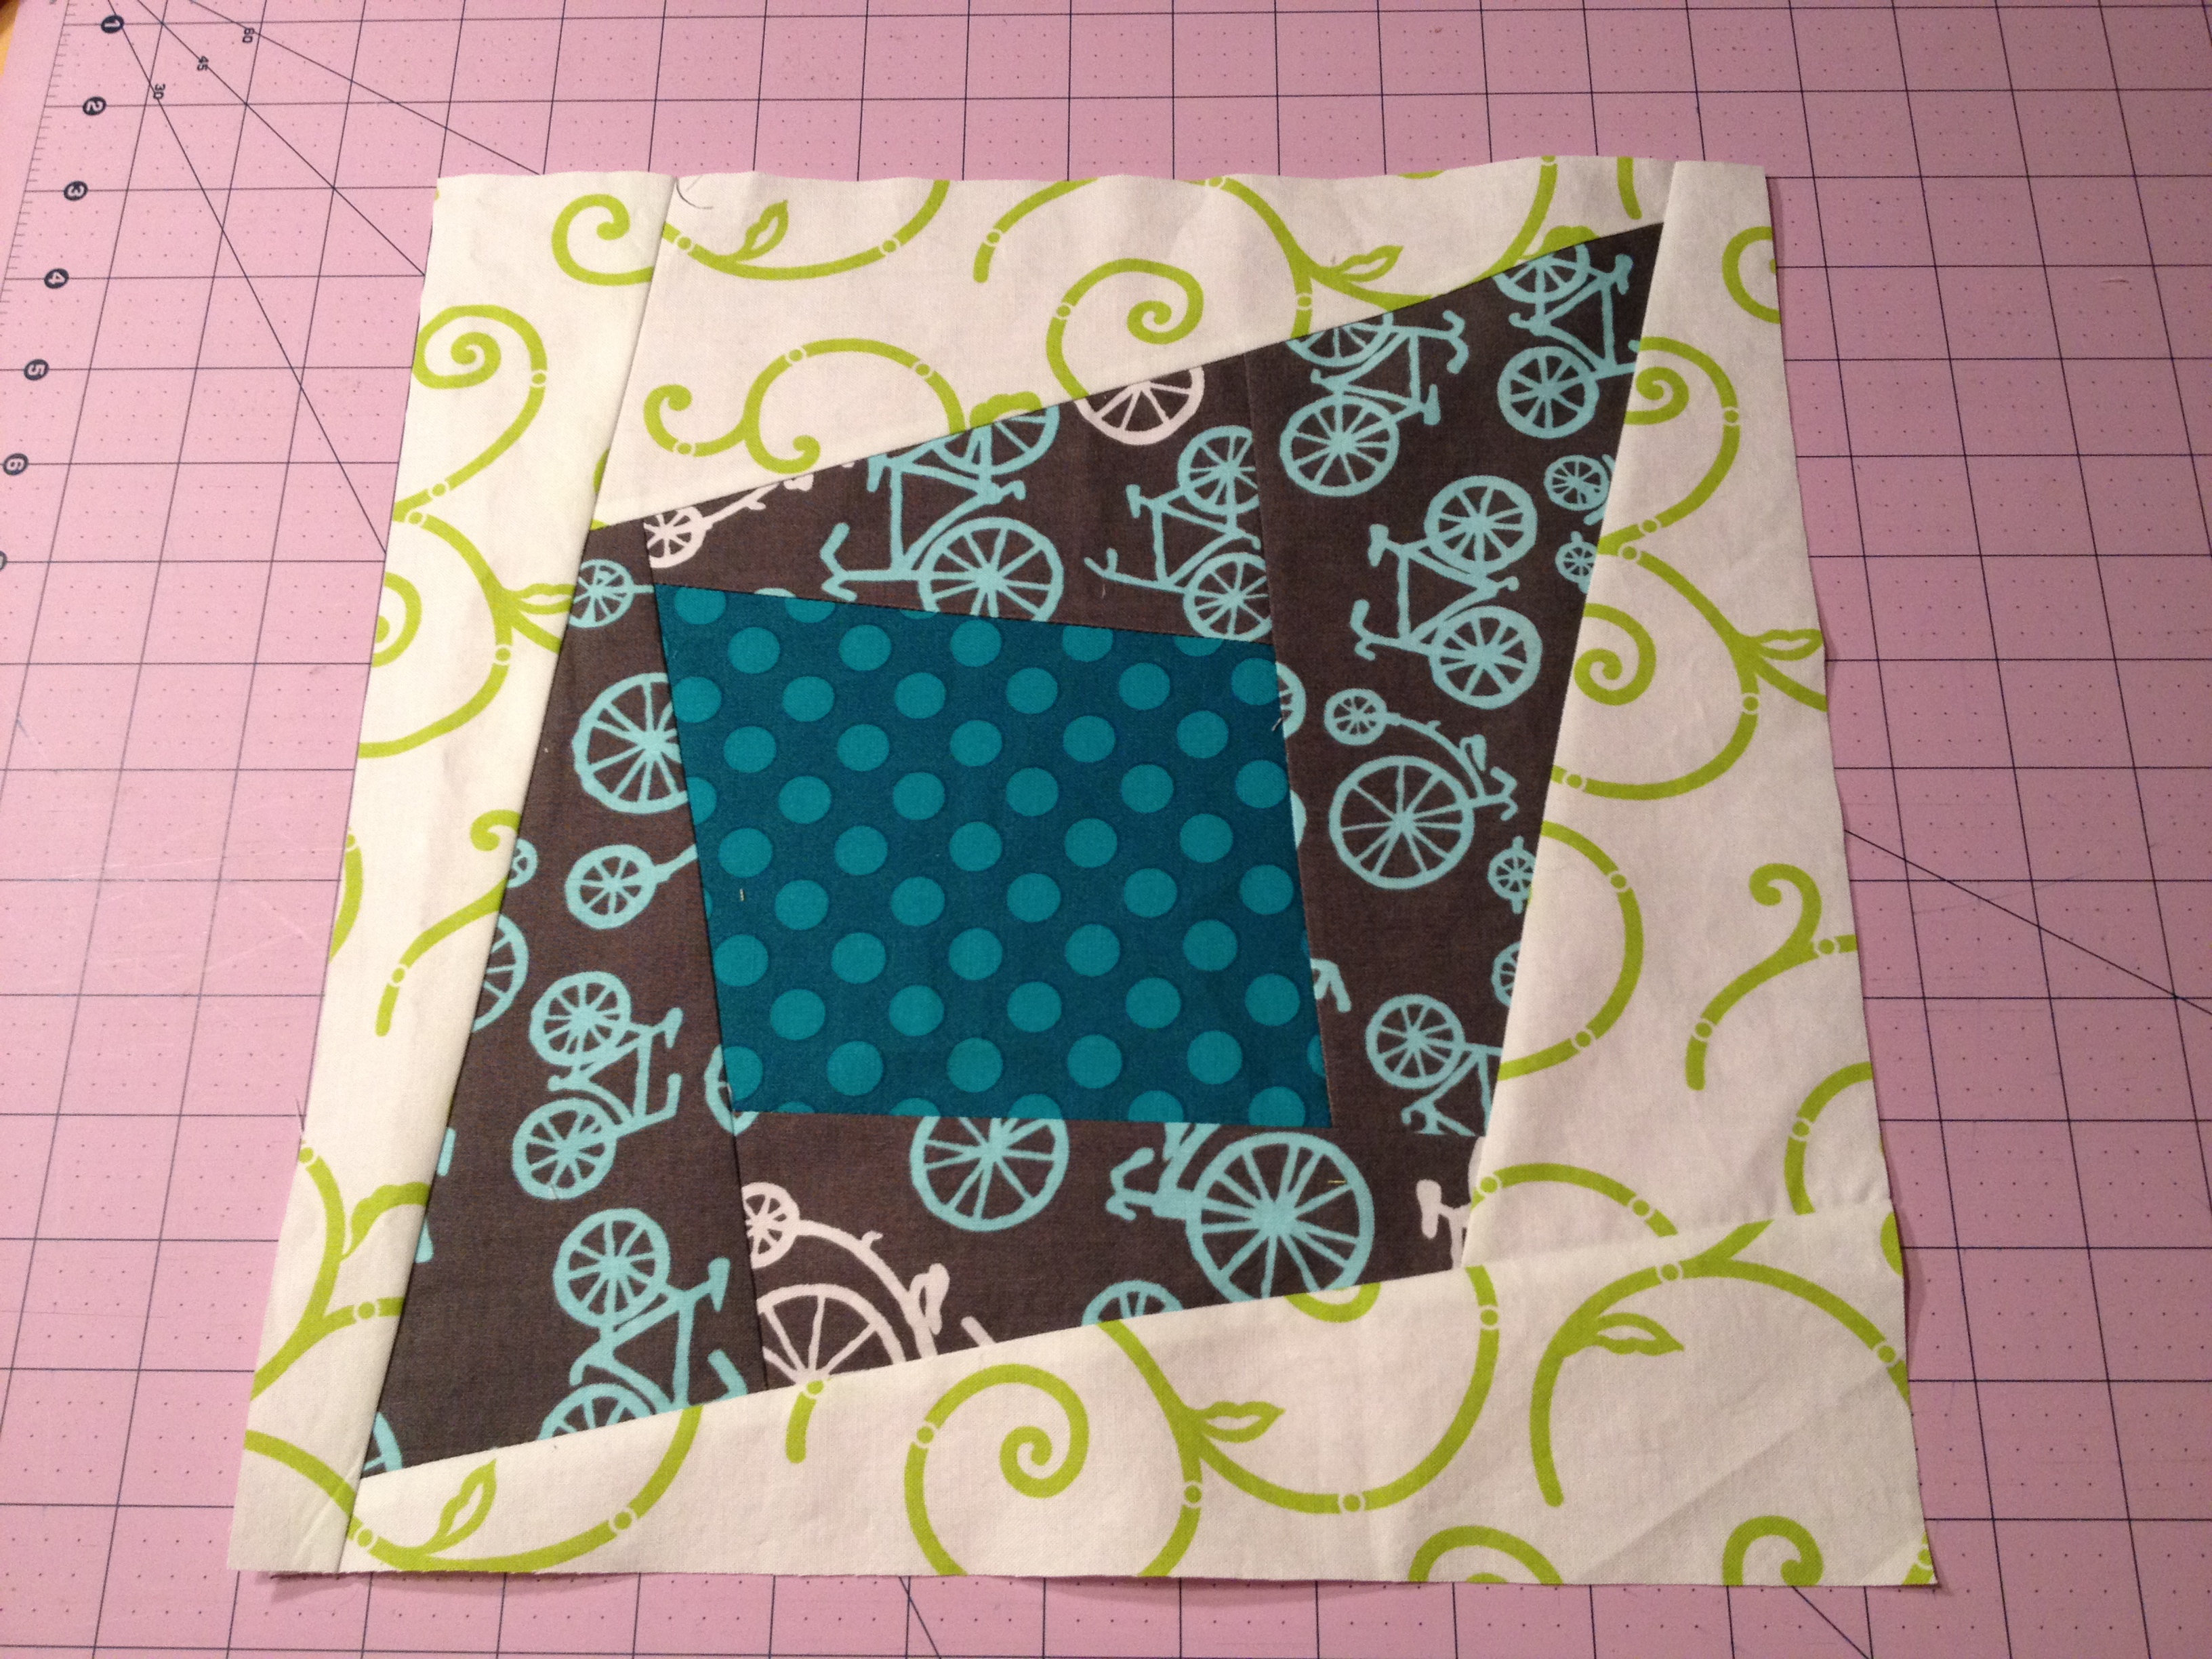
10. Your finished block should look like this (And, yes, this is a different arrangement of the fabrics than the layer we’ve been showing you above. That’s because when all was sewn and done, we realized this layer turned out the best for trimming. This may or may not have been due to all the wine we drank with dinner before the photo shoot.):
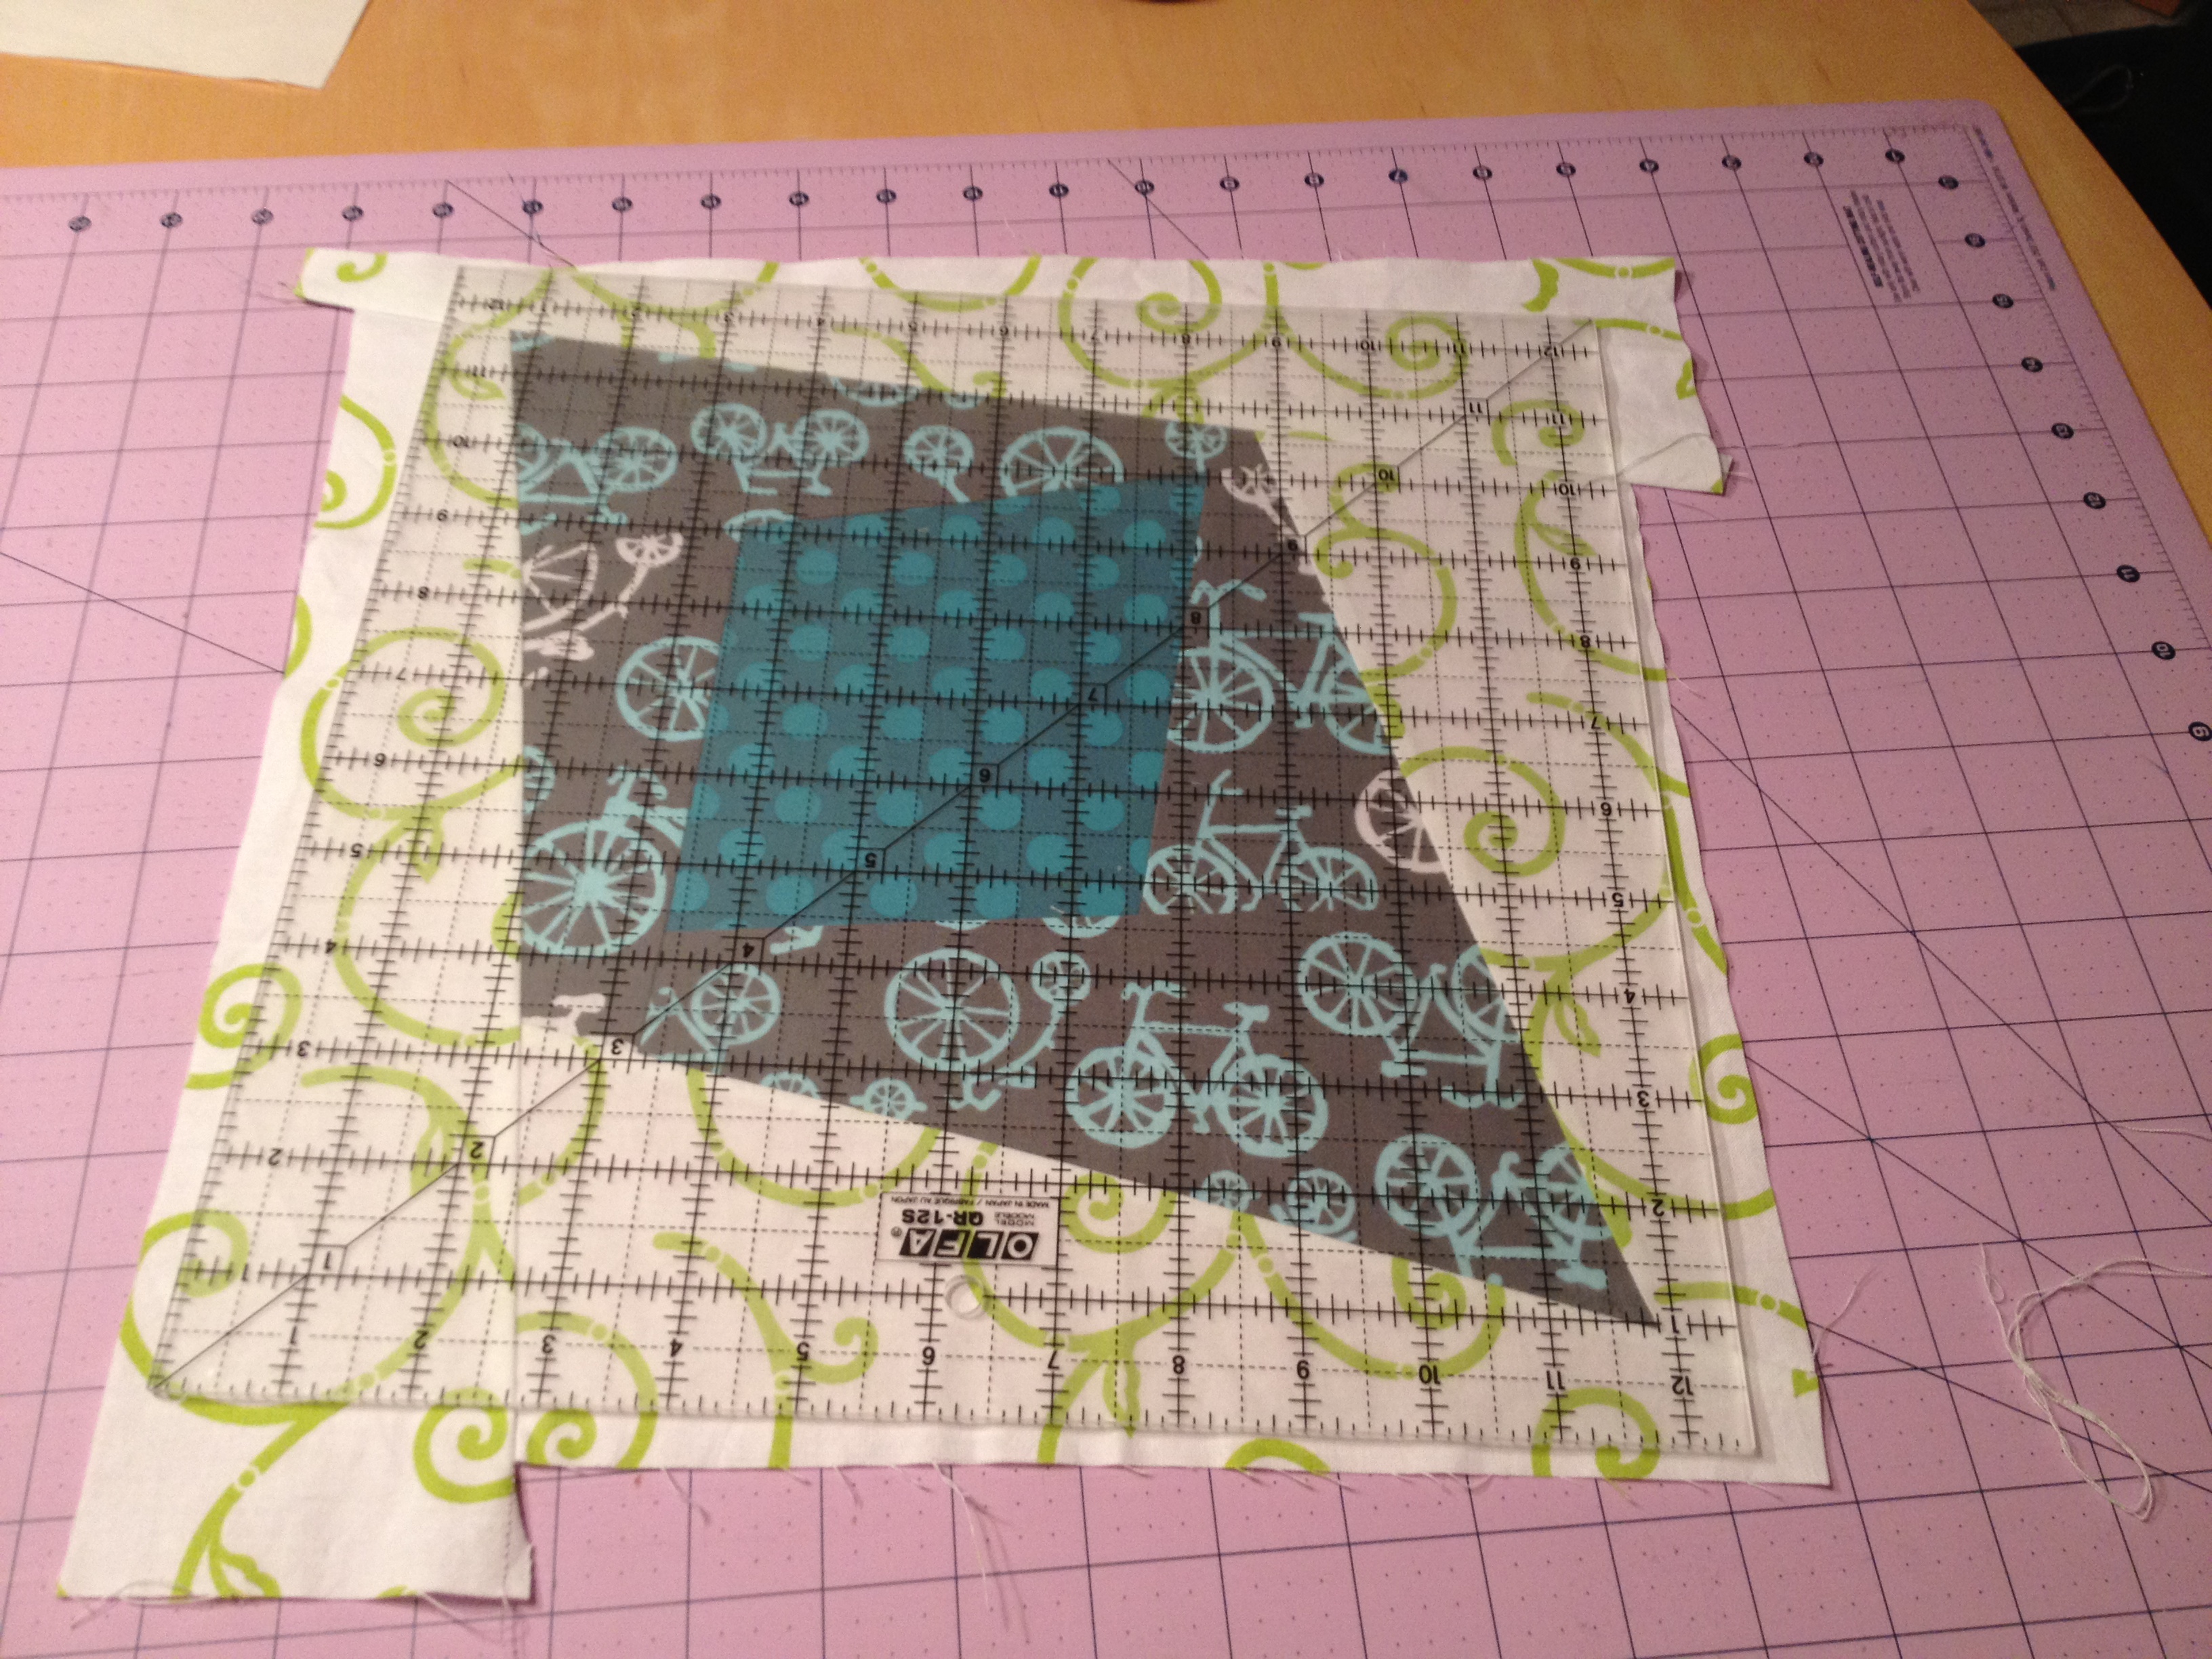
11. Now, trim it with a 12 ½” square ruler. Rotate the ruler any way you want for the blocks to all look a bit different in the same stack. This should give you 3 blocks. If you want more blocks, keep pulling fabrics in groups of 3 to make more. (I will warn you that this can be a bit addictive because it is so freeing!)
This is just one way to approach improvisational piecing. If you have some tips to share for how you prefer to improvise, share them below in the comments.


{ 6 comments… read them below or add one }
I hate to put this in the comments, but can’t find a “contact us” link anywhere: Is it my computer or the blog page? I cannot get the page to load, I’ve waited 20 min and only one of the photos has loaded completely. Interestingly, I also received this blog post on my reader today:
http://www.blogsbyheather.com/2012/09/101-blogging-tips-tip-21-loading-time.html?utm_source=feedburner&utm_medium=feed&utm_campaign=Feed%3A+BlogsByHeather+%28Blogs+By+Heather%29&utm_content=Google+Reader
I’d really like to read the entire tutorial, please help!
Looks like I need to replace these photos with lower res ones. Sorry you are having issues. I’ll work on it and let you know when it is done. As for contacting us, if you go to the purple About tab at the top of the page you’ll see a drop down menu with links for each of us. You can click on one and our email address will be there, or you can leave a comment on that page that will go directly to the person you are trying to reach.
Thanks!
This really helps! I have often wondered how to get these wonderful really creative shapes….
Help! I can’t figure out how to get to the Sept. 7 blog. When I type in the search box it takes me to the page to buy issues of GenQ. I think I might be able to hit previous posts and get back there eventually. I don’t see any link on the right side.
OK, I clicked on the GENQ at the top and got the same page above, and it came up with the above blog, no comment box, like this at the bottom, instead it has different previous posts.
I have no idea how to make all this computer stuff work, so I have no idea why it does what it did. Thanks for all of the help you give us on these blog posts.
Try this link, Debbie:
http://generationqmagazine.com/2012/09/q-torial-improv-piecing-part-1/
I’ll add the link into the text of today’s post as well.
I love this pattern. I love wonky anything.